Google Cloud Storage
1. Create your credentials (Service Account Key)
Open your Google Cloud Storage dashboard and go to the IAM & Admin Service accounts page Step 1.1: Create a new service account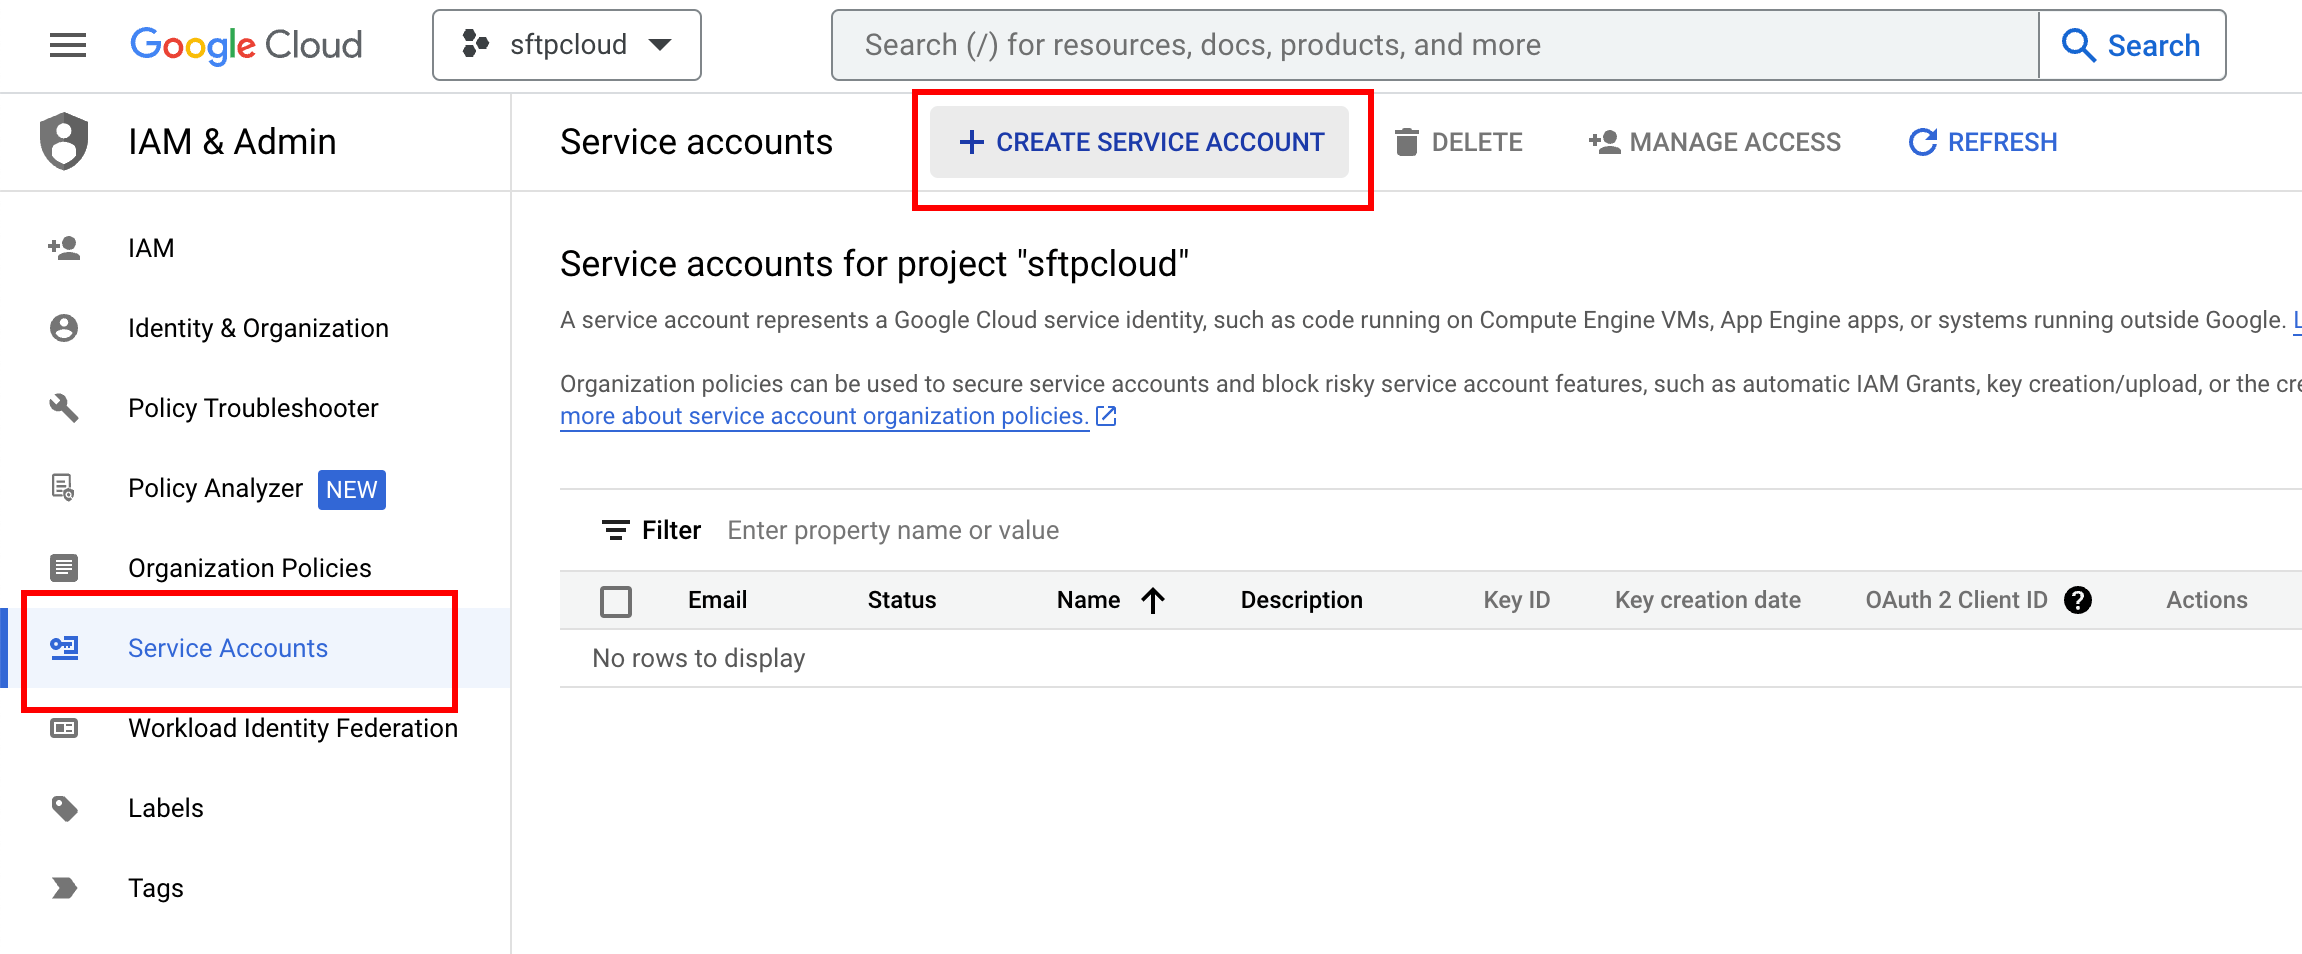 Step 1.2: Add service account details
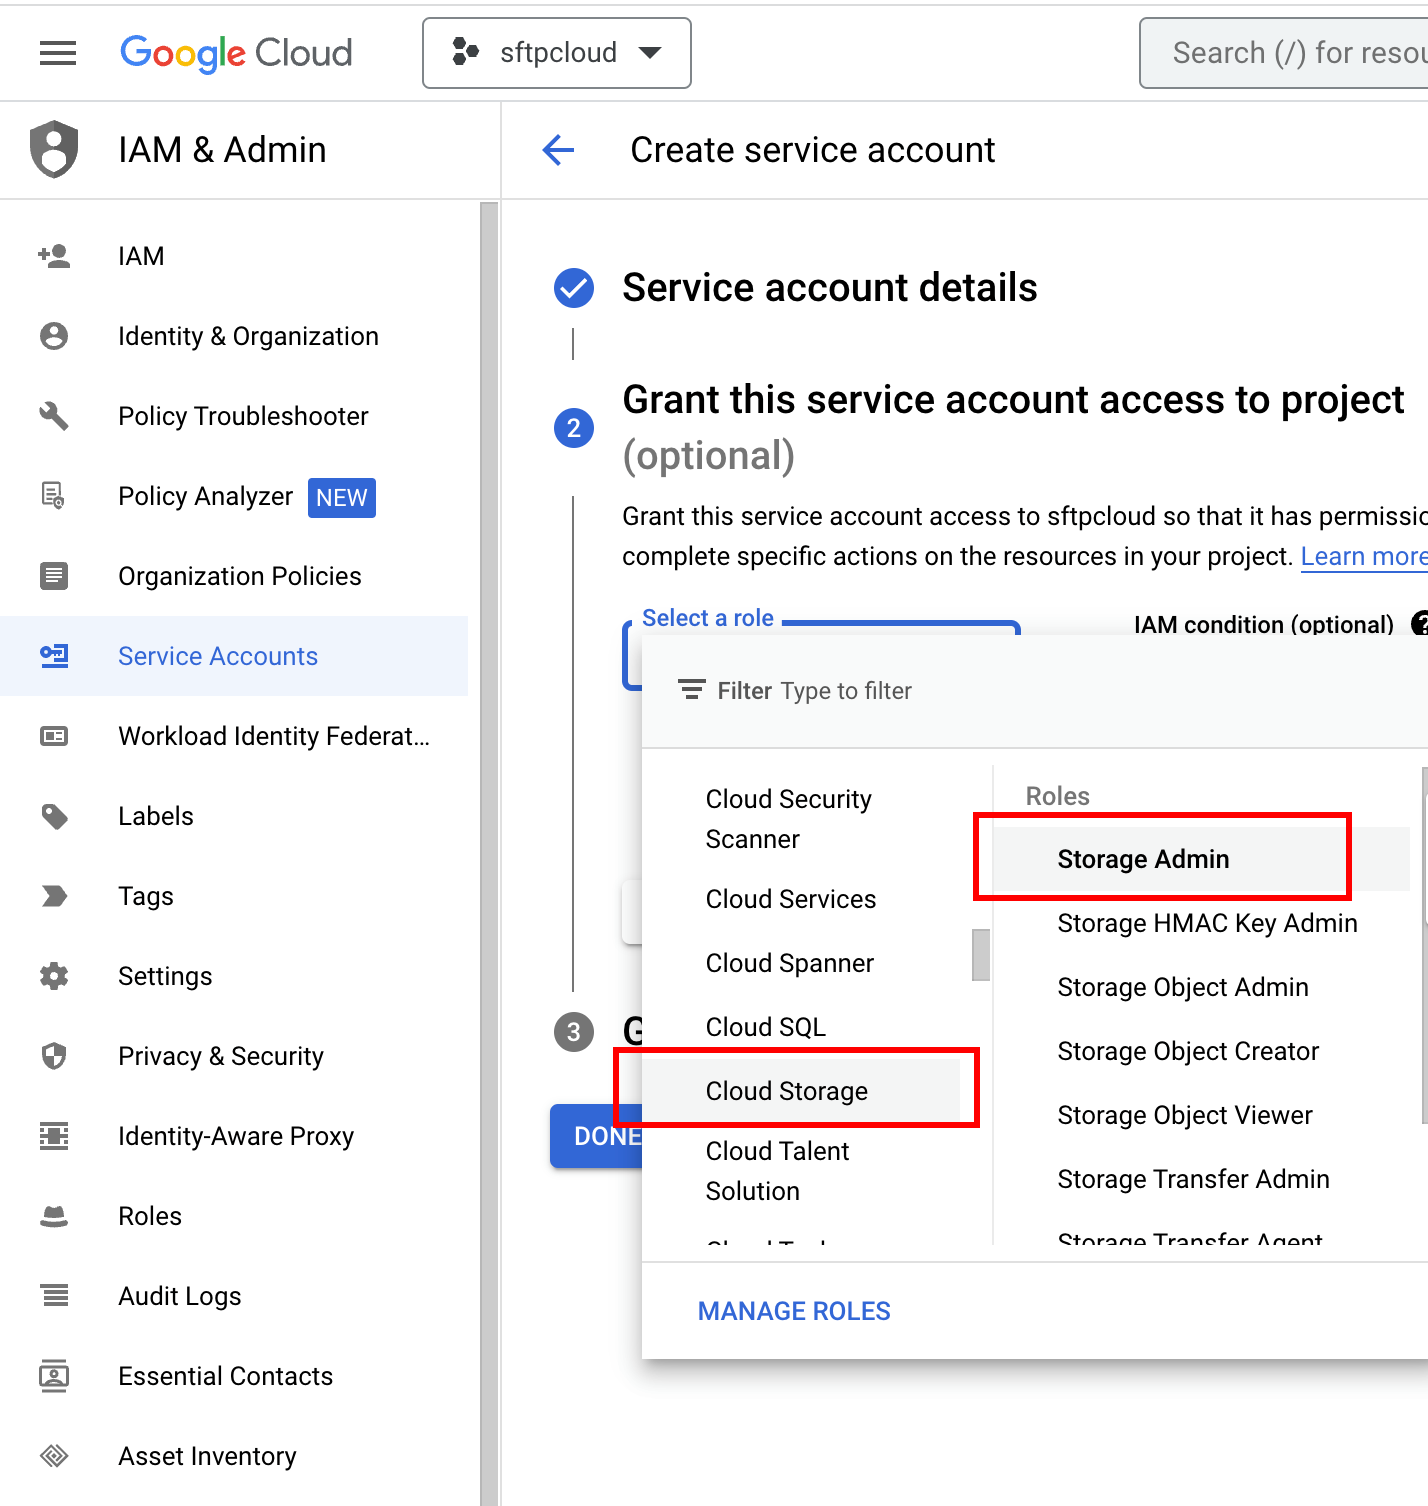
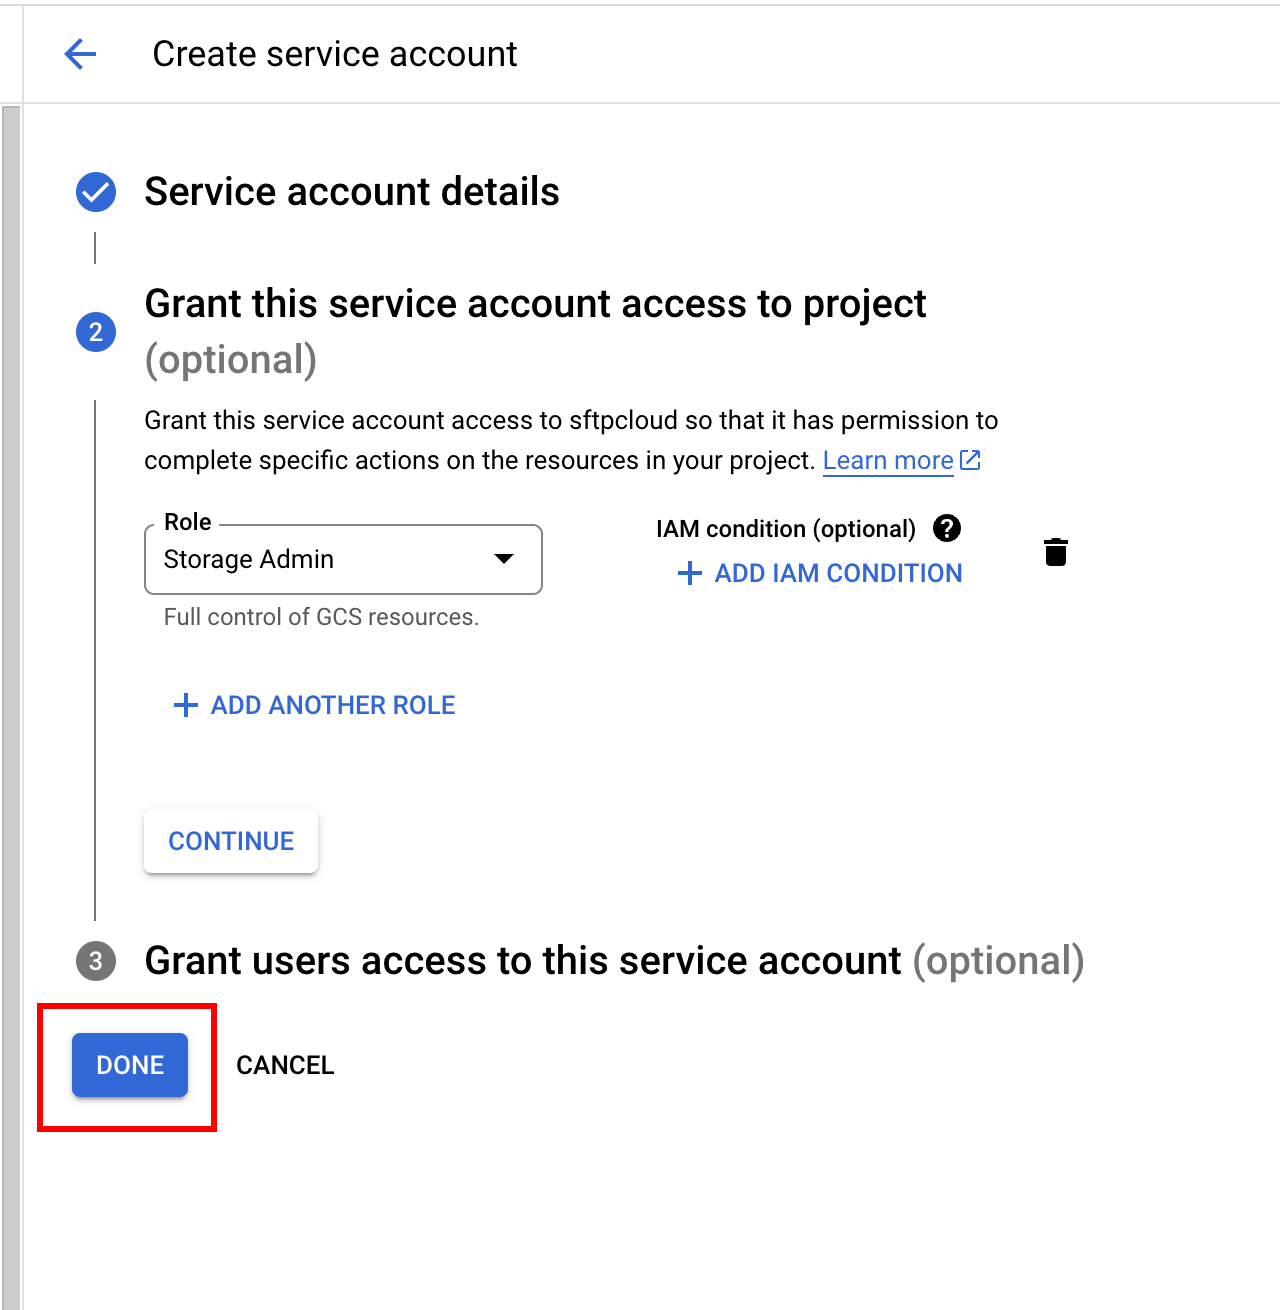
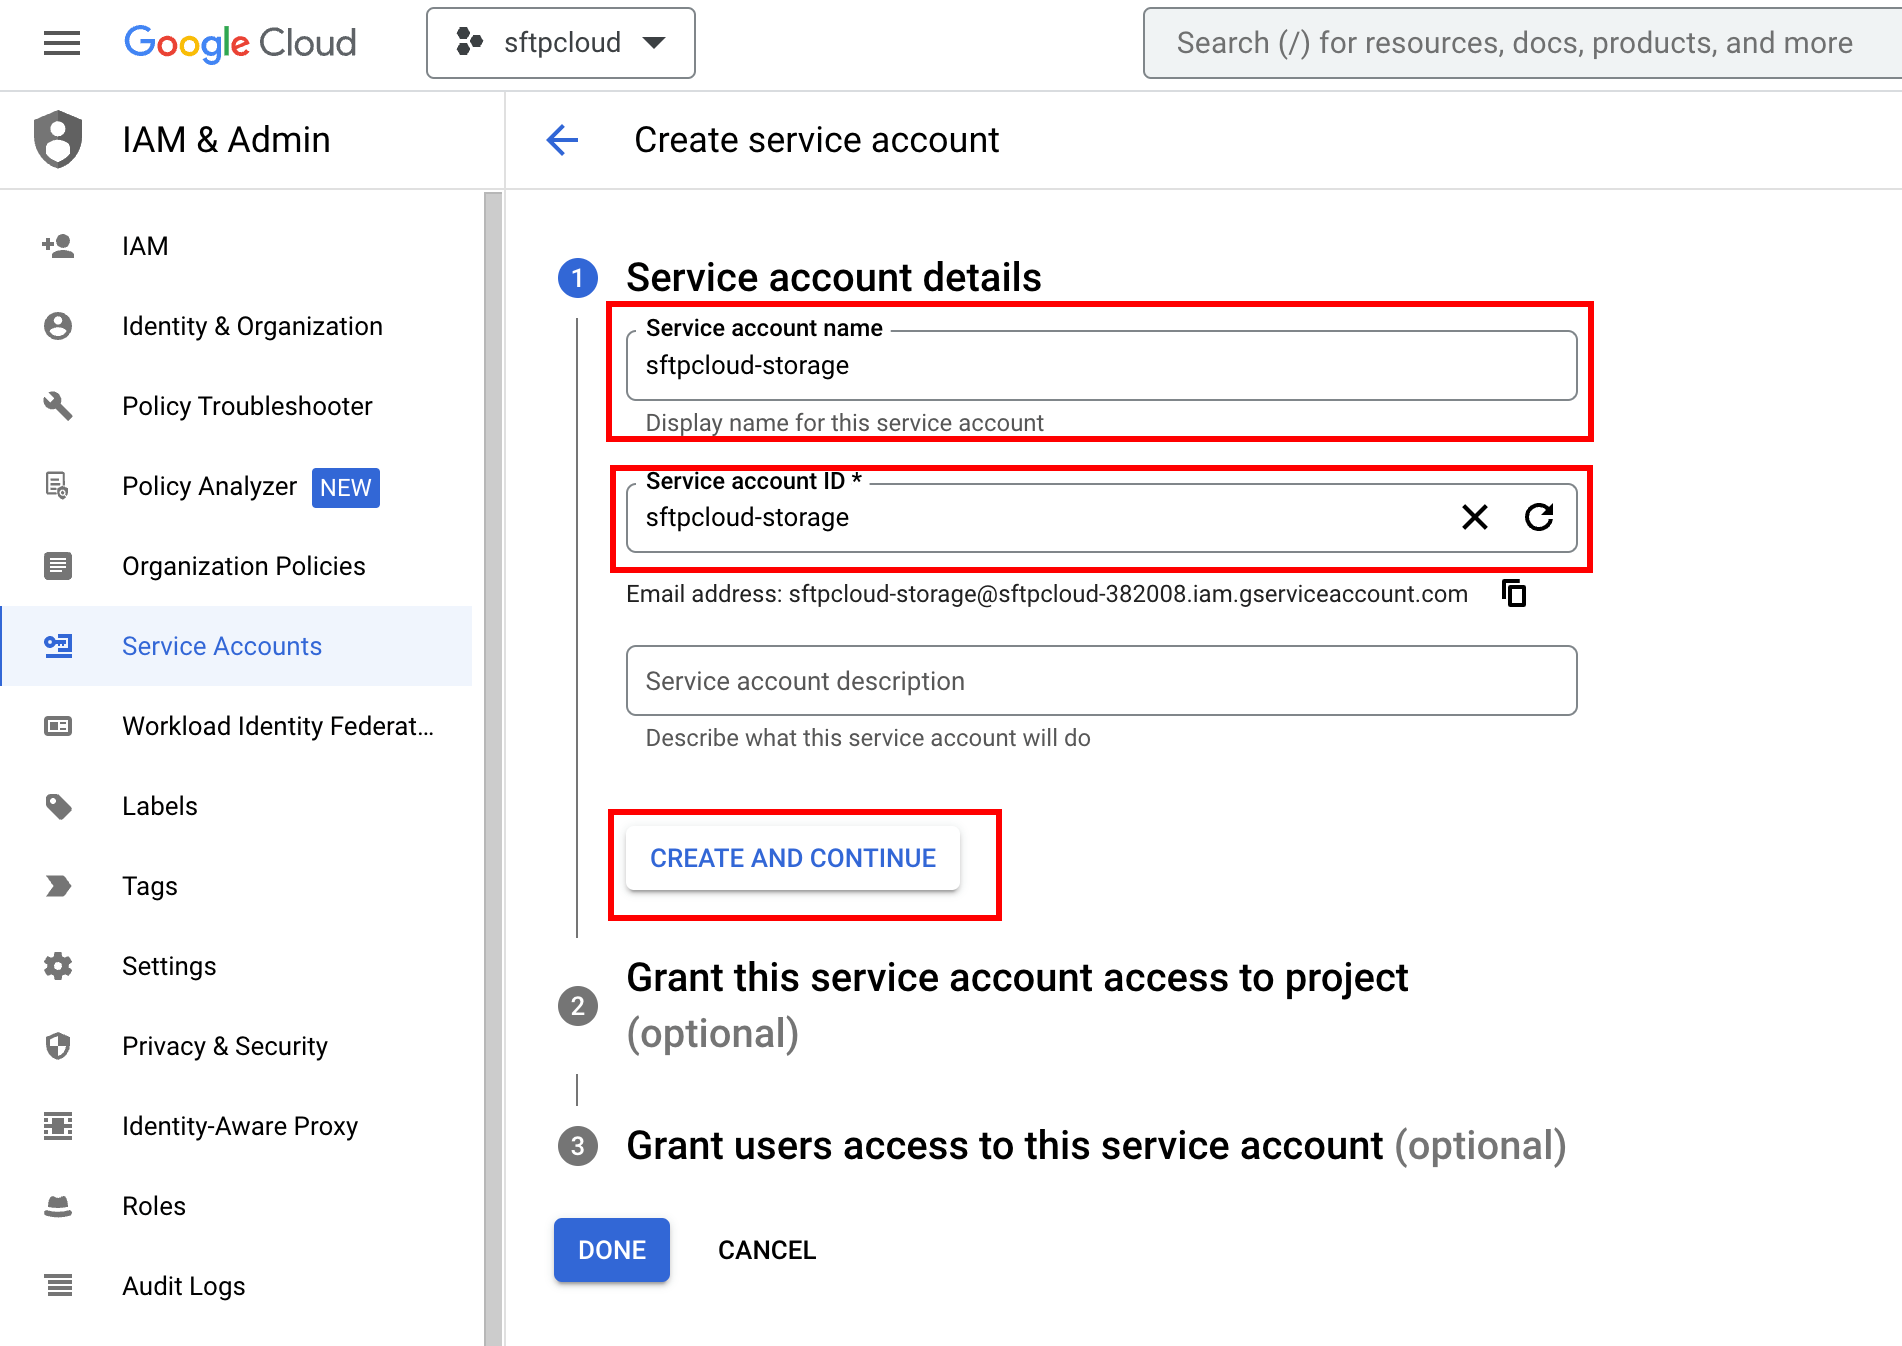 Now set the permissions of the service account.
 Once the permissions are set, click
Done
.
Once the permissions are set, click
Done
.
 Step 1.3: Select the created service account
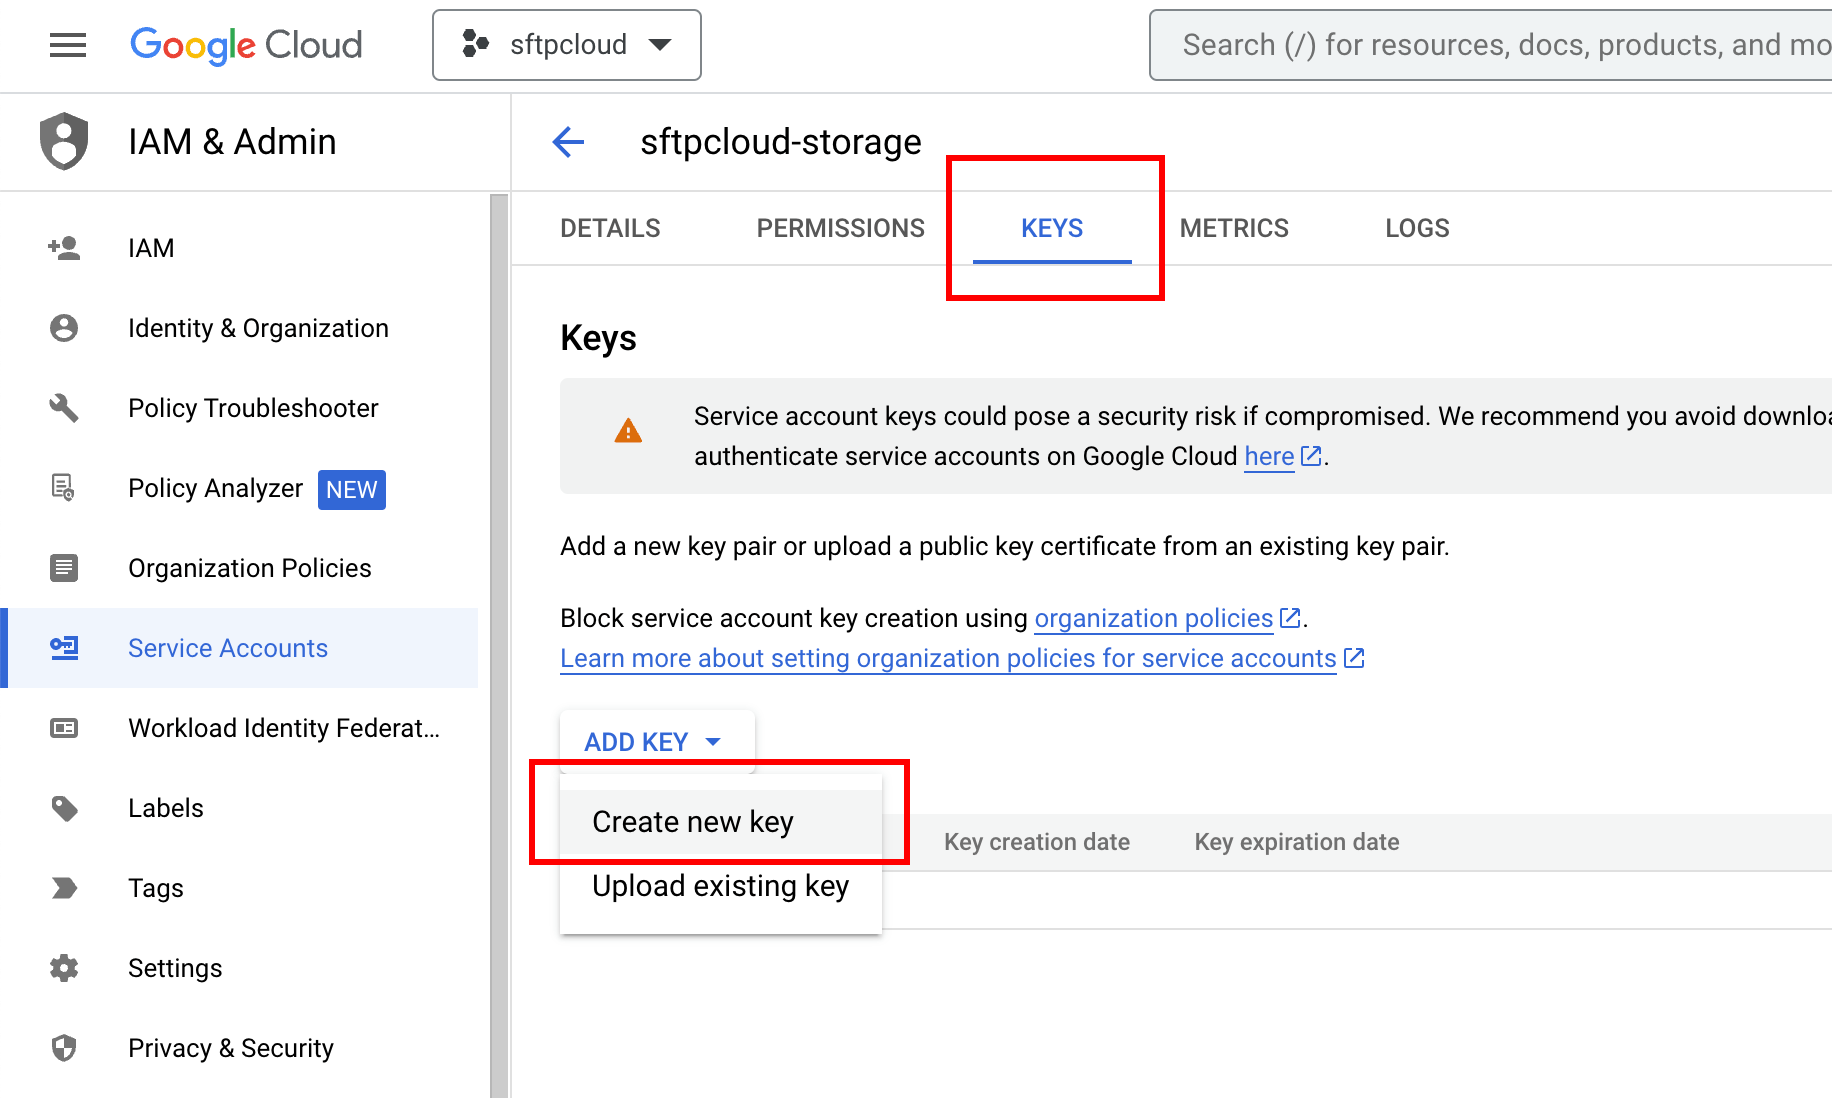
 Step 1.4: Create a new key for your service account
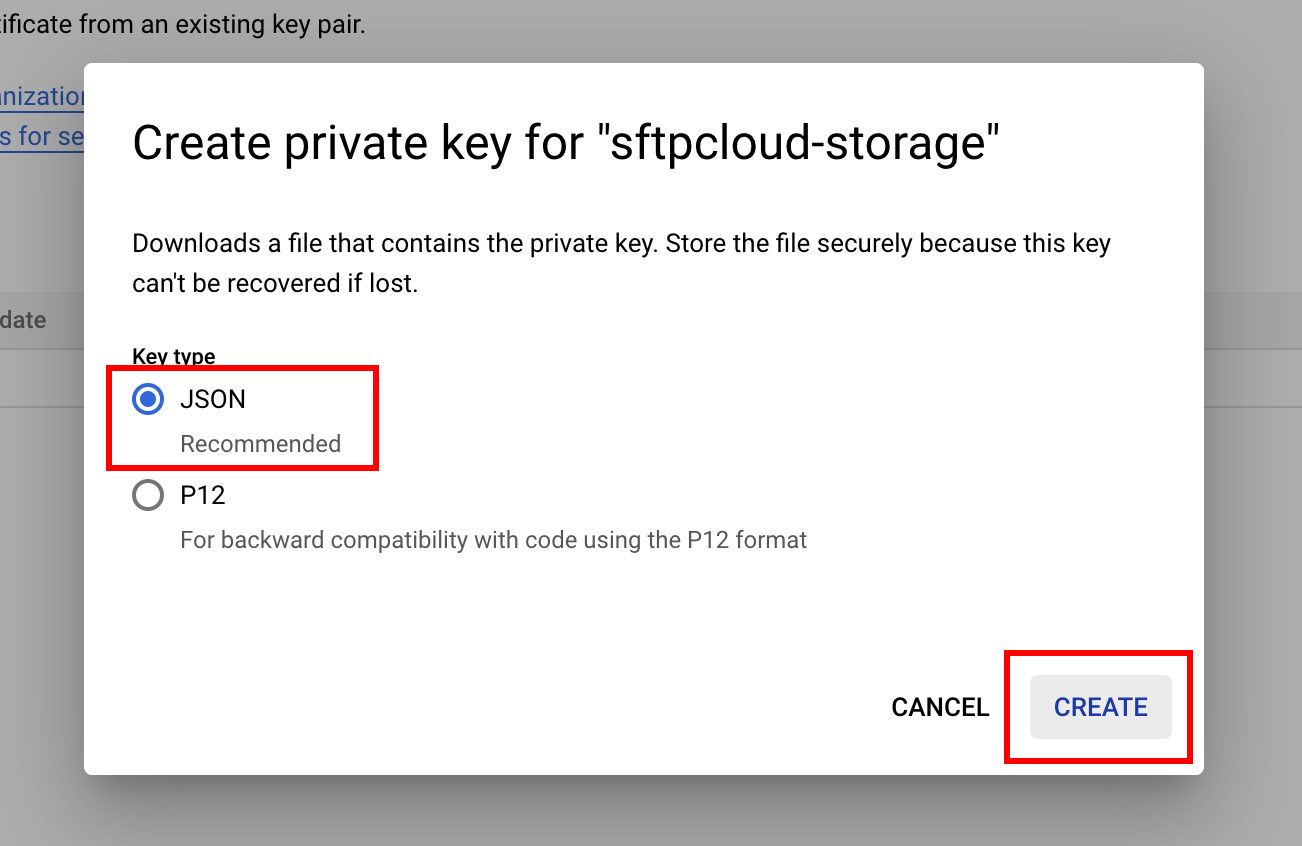
 Step 1.5: Create a JSON private key for your service account
 Step 1.6: Download your service account key
After you create the key, it will be downloaded. Keep the file because you will need its content later.
Step 1.6: Download your service account key
After you create the key, it will be downloaded. Keep the file because you will need its content later.
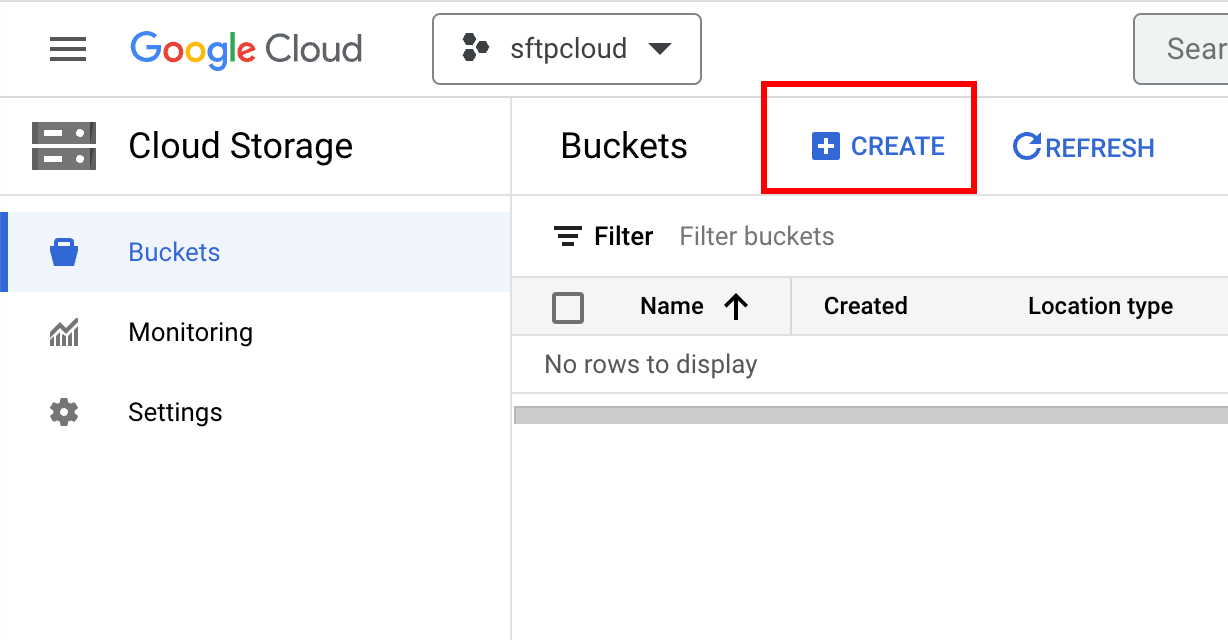
2. Create a new bucket
Step 2.1: Navigate to your buckets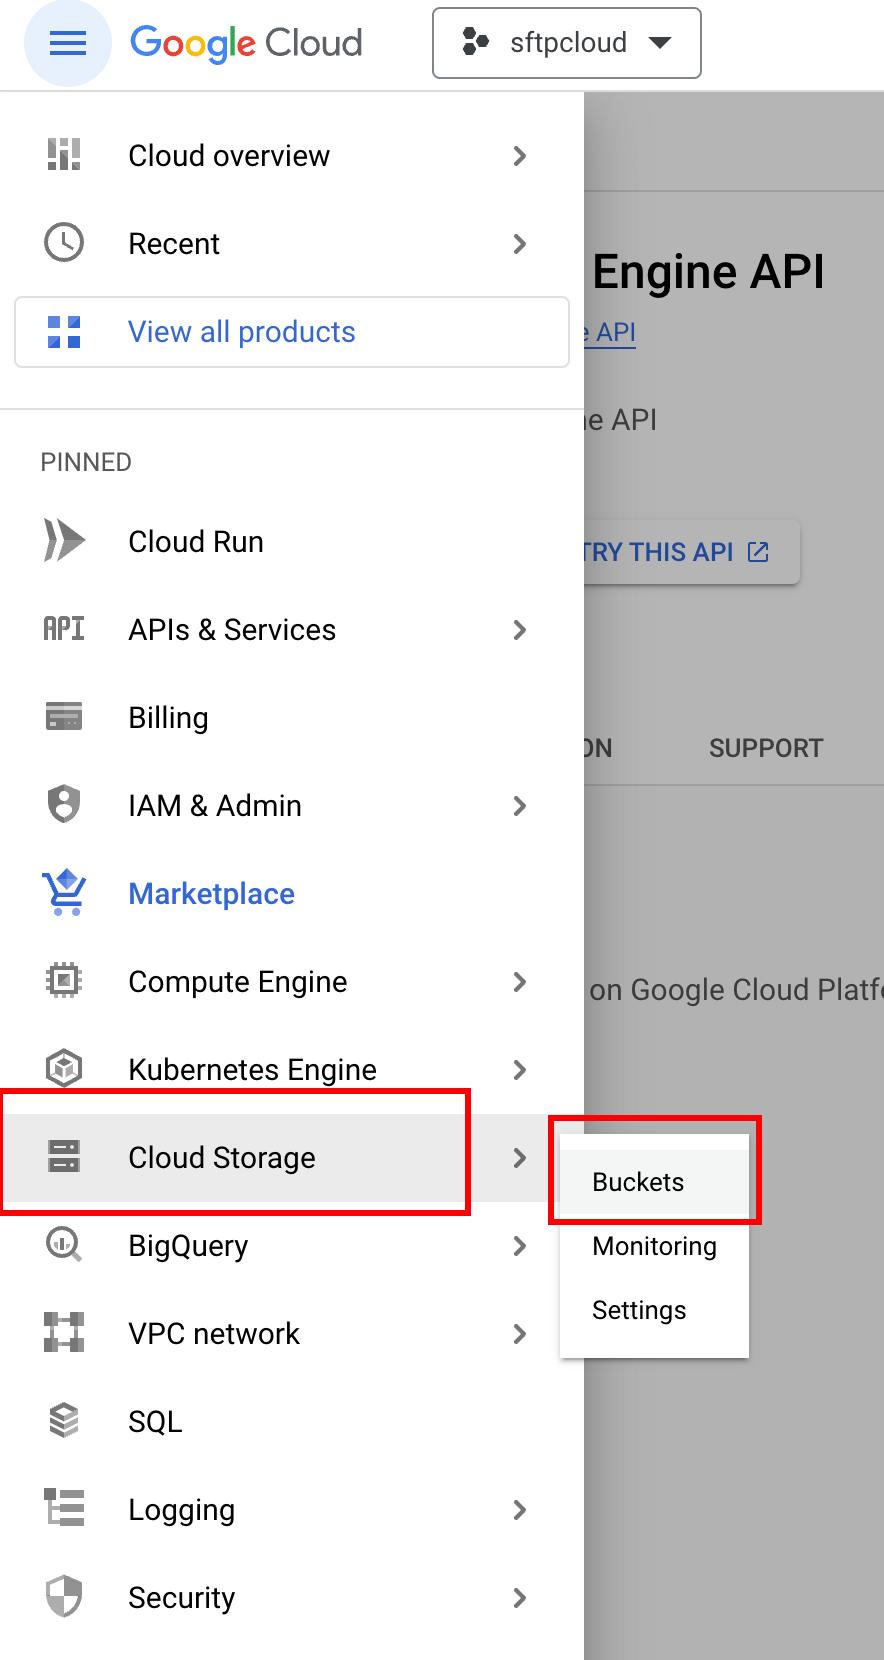 Step 2.2: Click "Create"
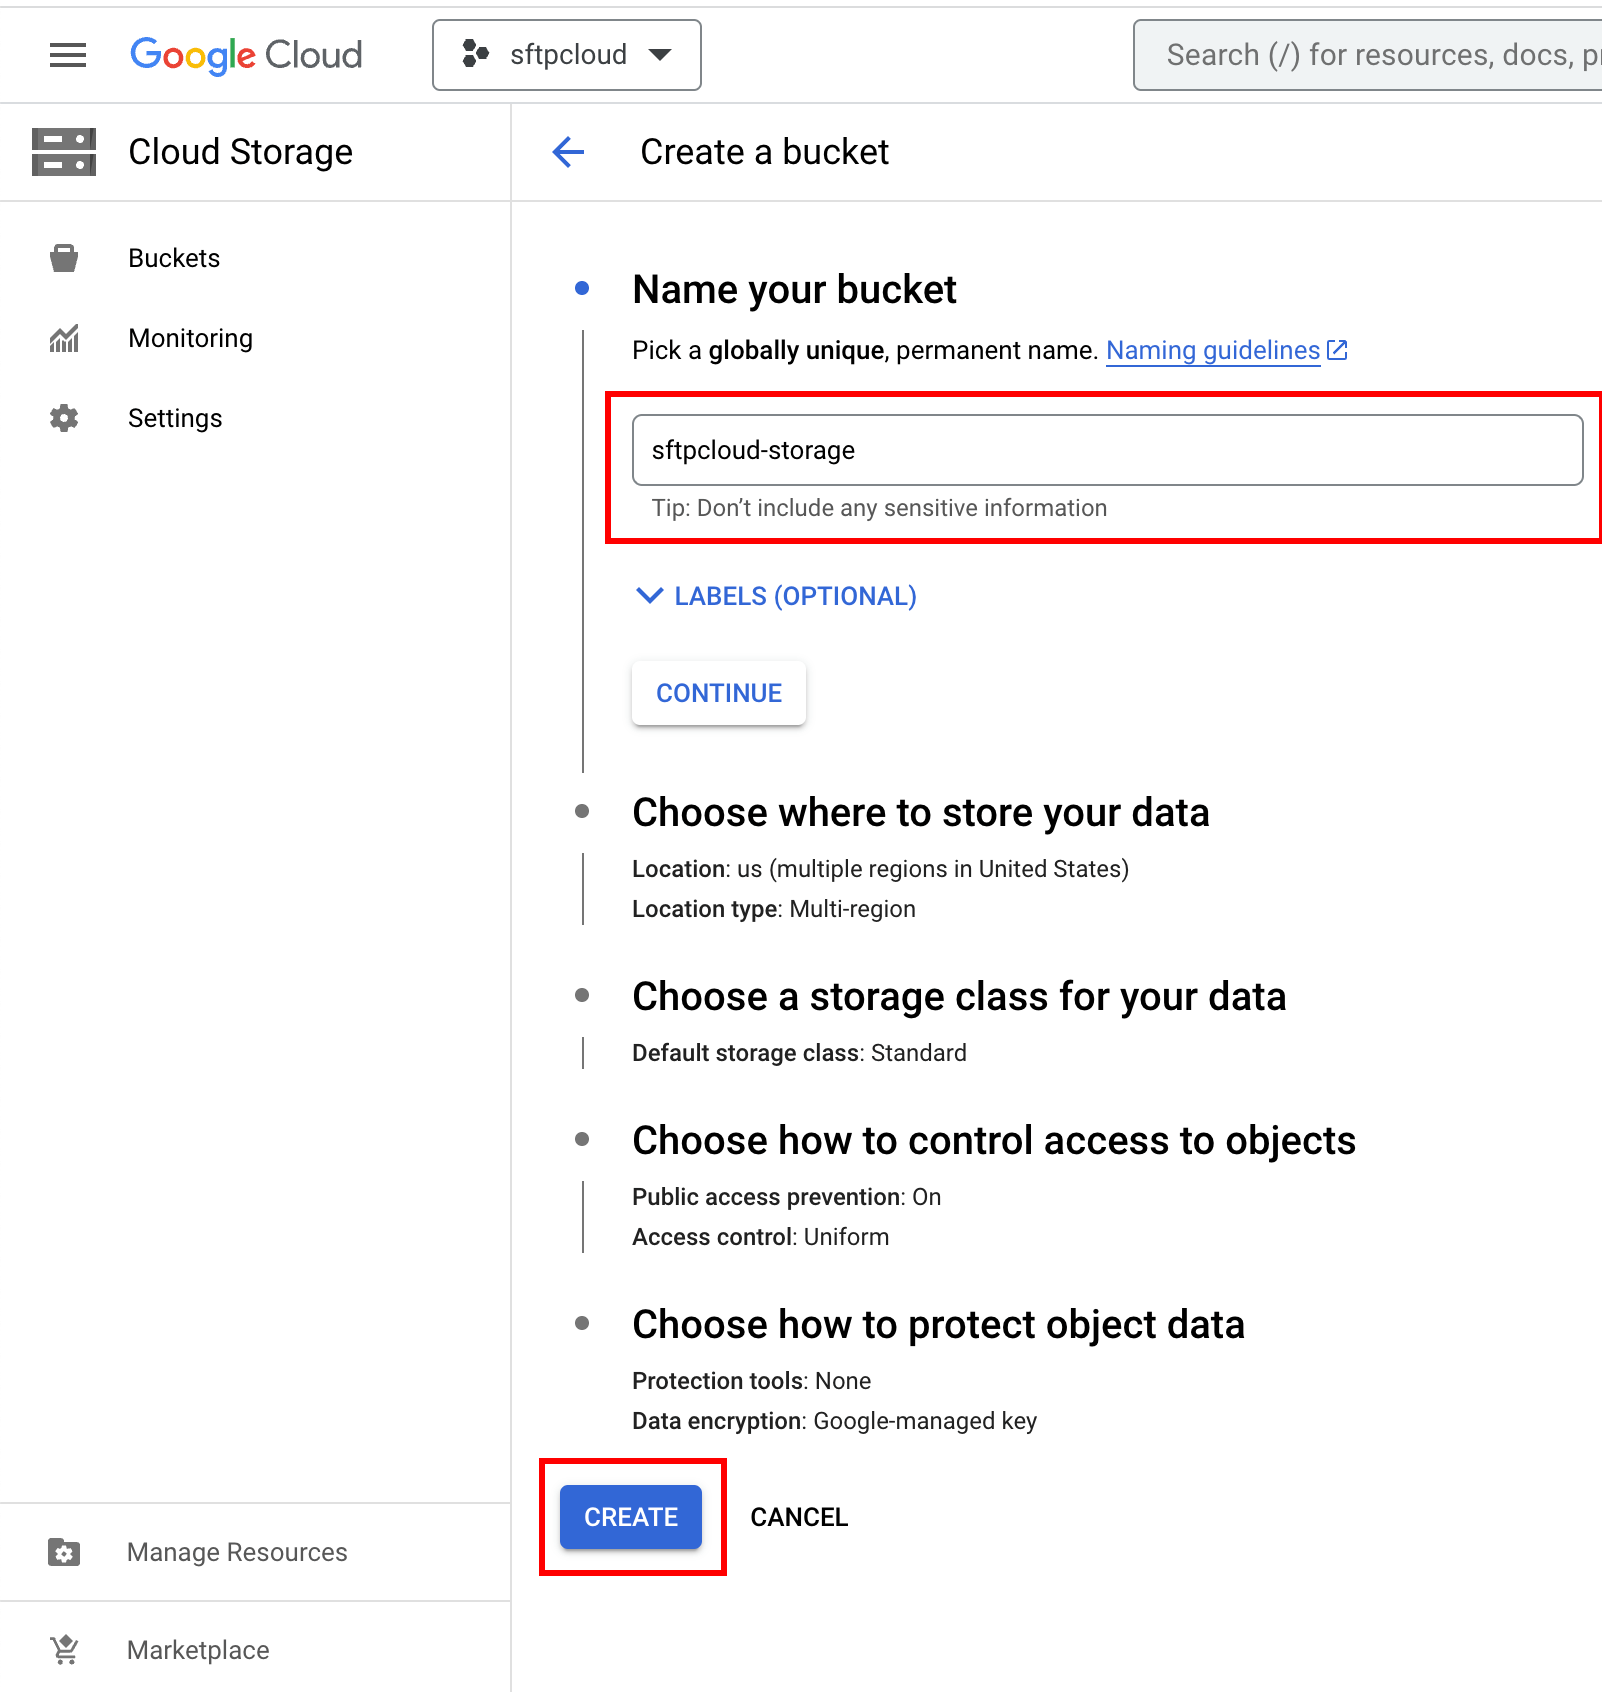
 Step 2.3: Name your bucket and click create
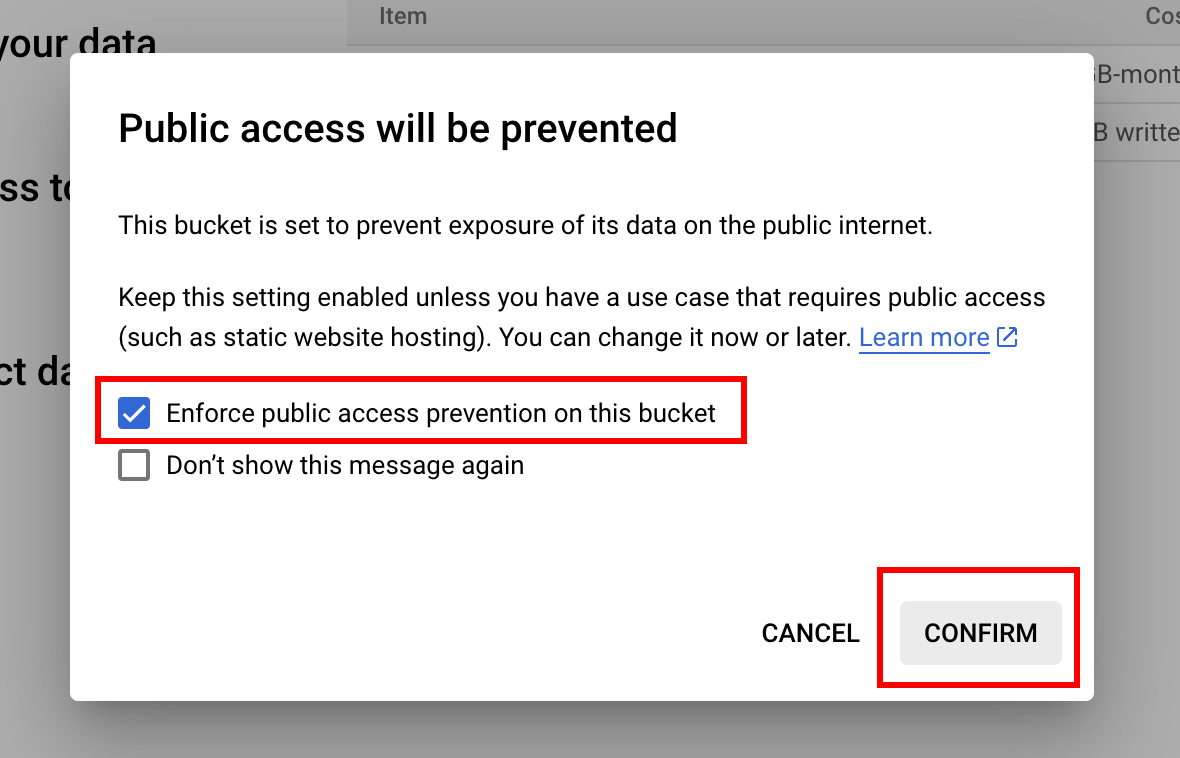
 If you get a warning regarding public access, enforce public access prevention.
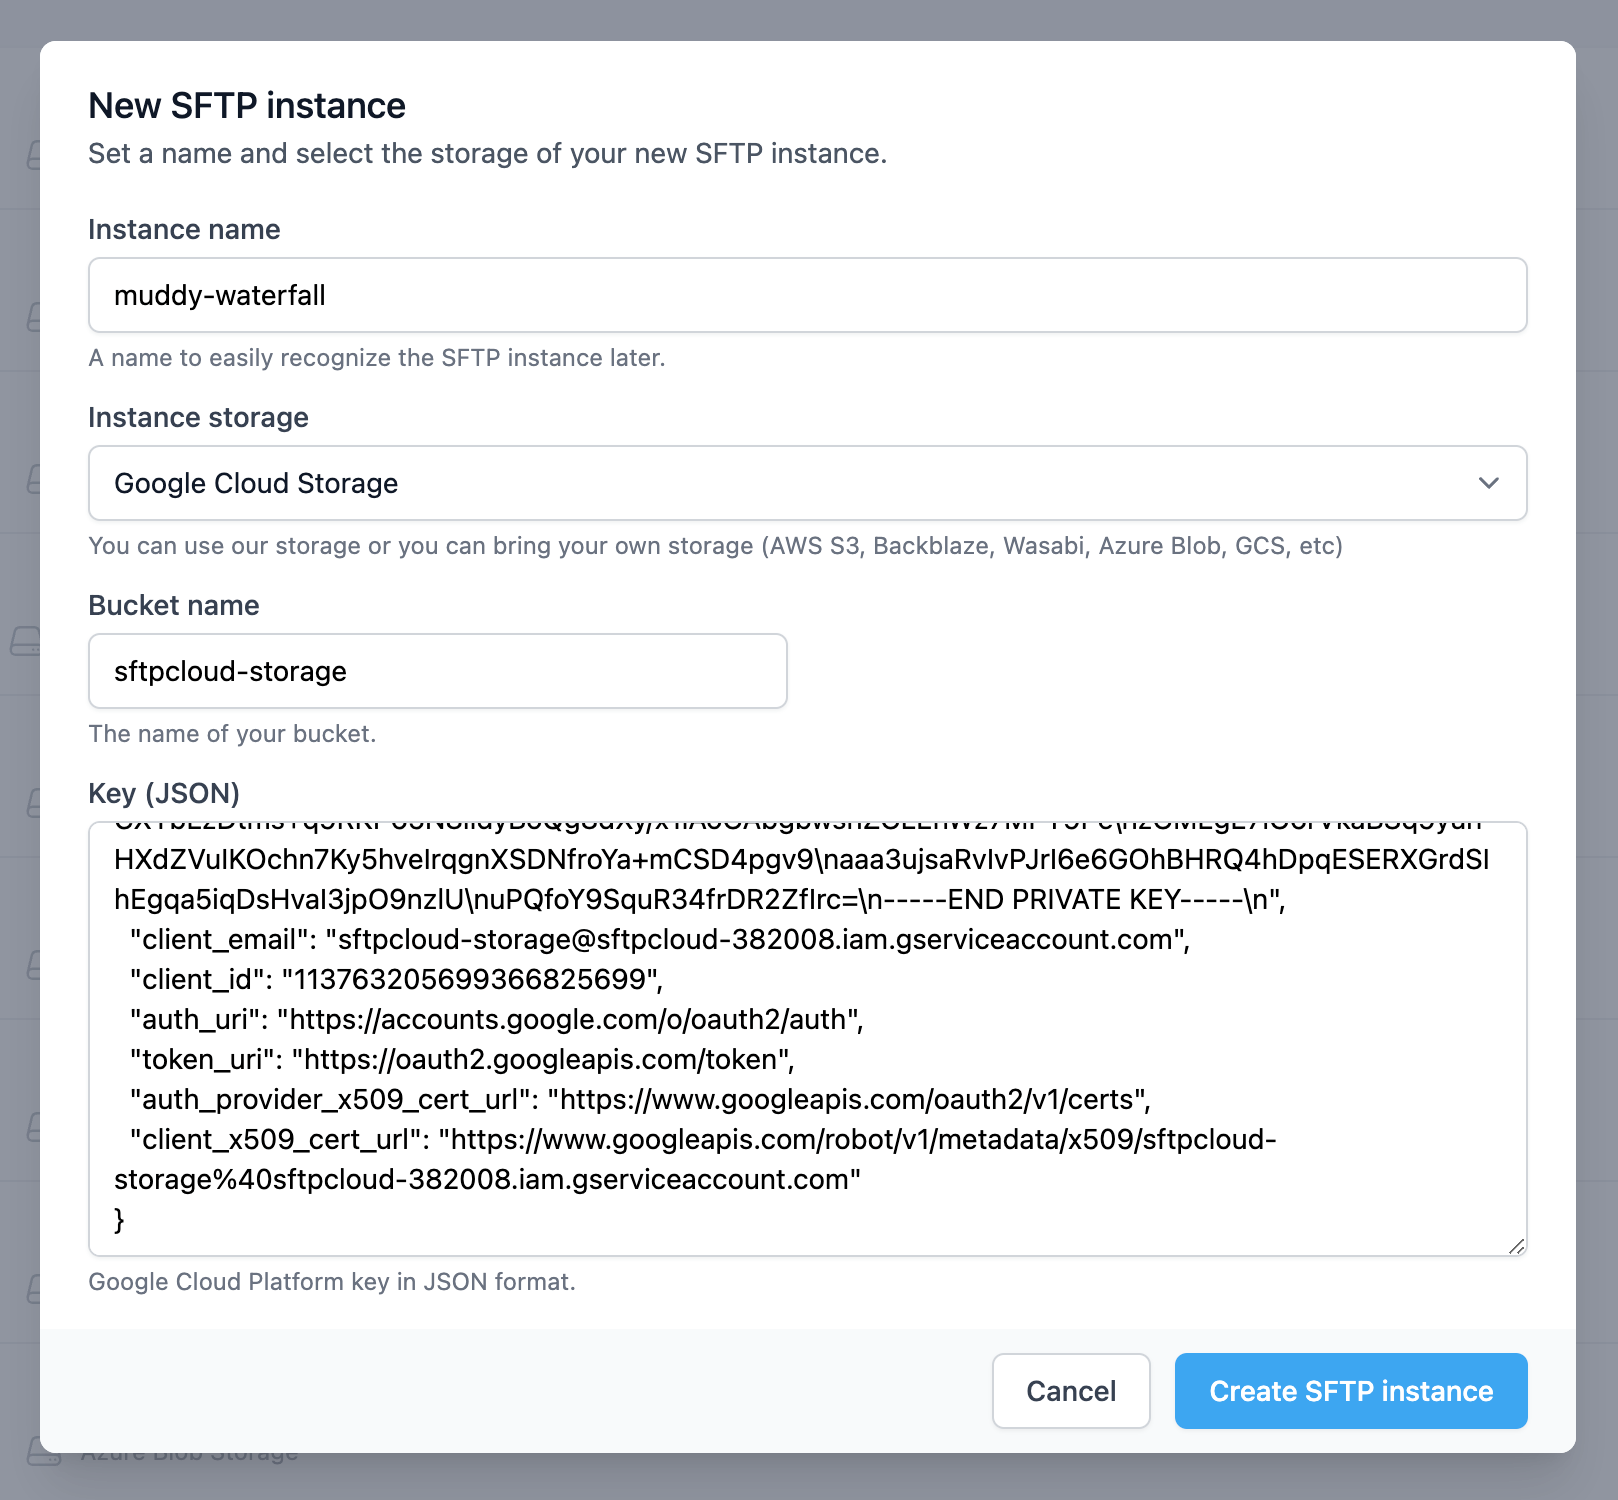
3. Create an SFTP instance using the new storage
Follow the steps from here in order to create a new instance and select Google Cloud Storage as the storage type. When Google Cloud Storage is selected, two additional inputs will appear. Fill the first input with the bucket name and the second input with the service account JSON key.