Cloudflare R2
1. Create a new R2 bucket
Open your Cloudflare dashboard, click R2 in the left sidebar, and then click the Create bucket button. Give a name to the new bucket and click Create bucket .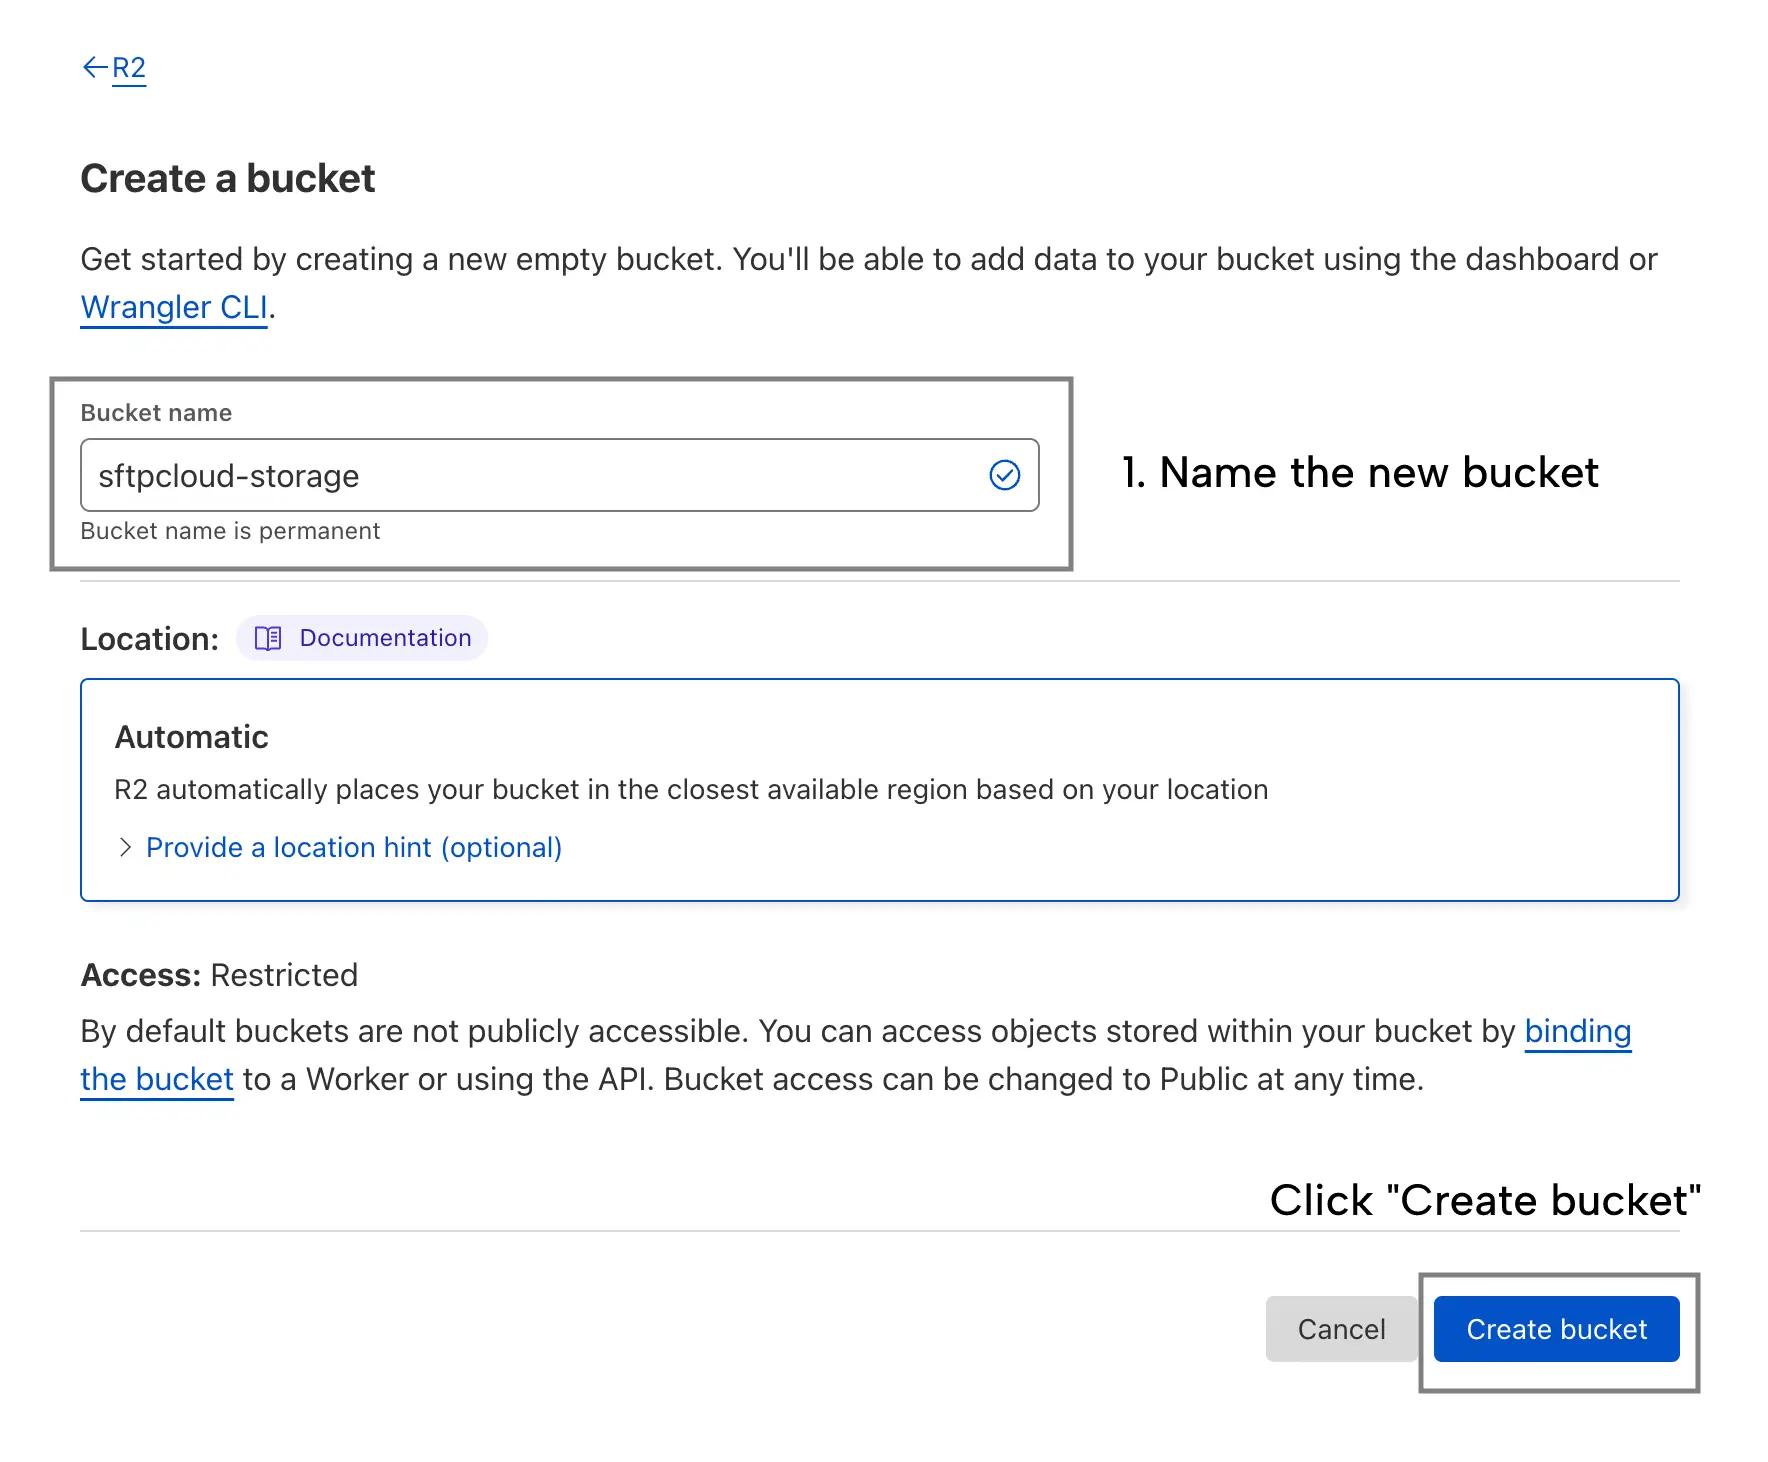
2. Create a new R2 API token
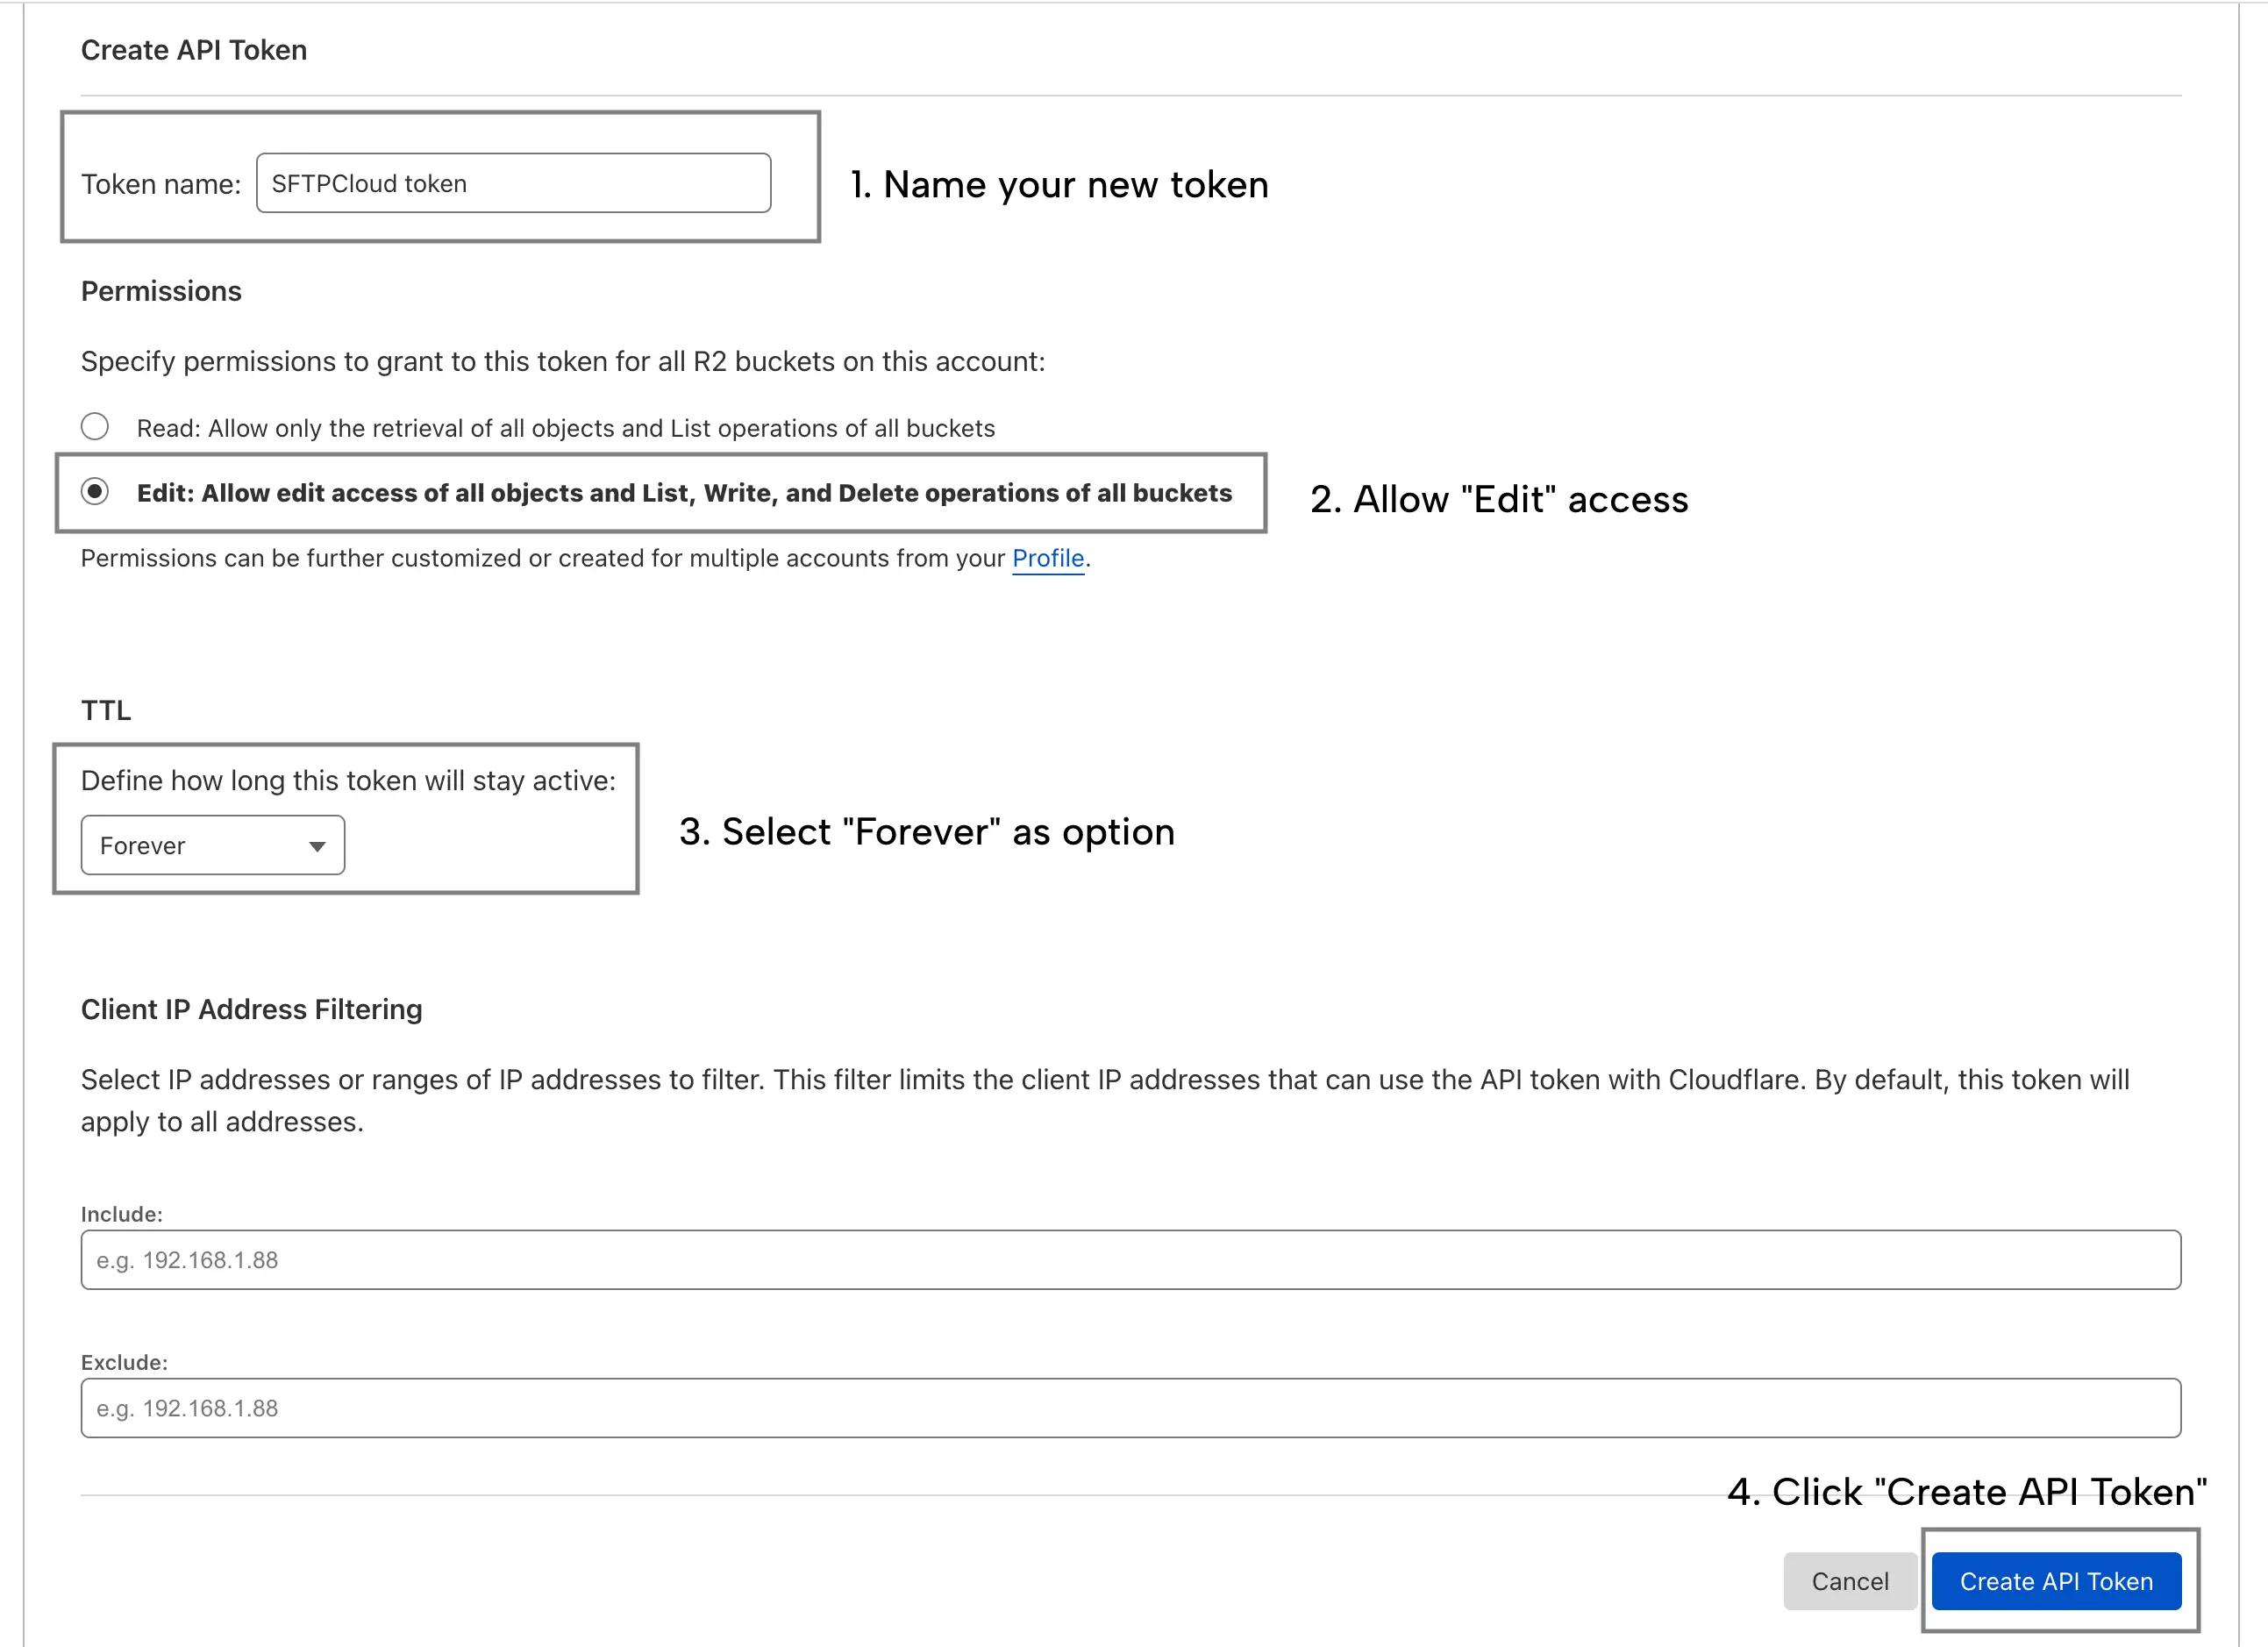
From the R2 main page, click Manage R2 API Tokens. On the R2 API tokens page, click the Create API token button.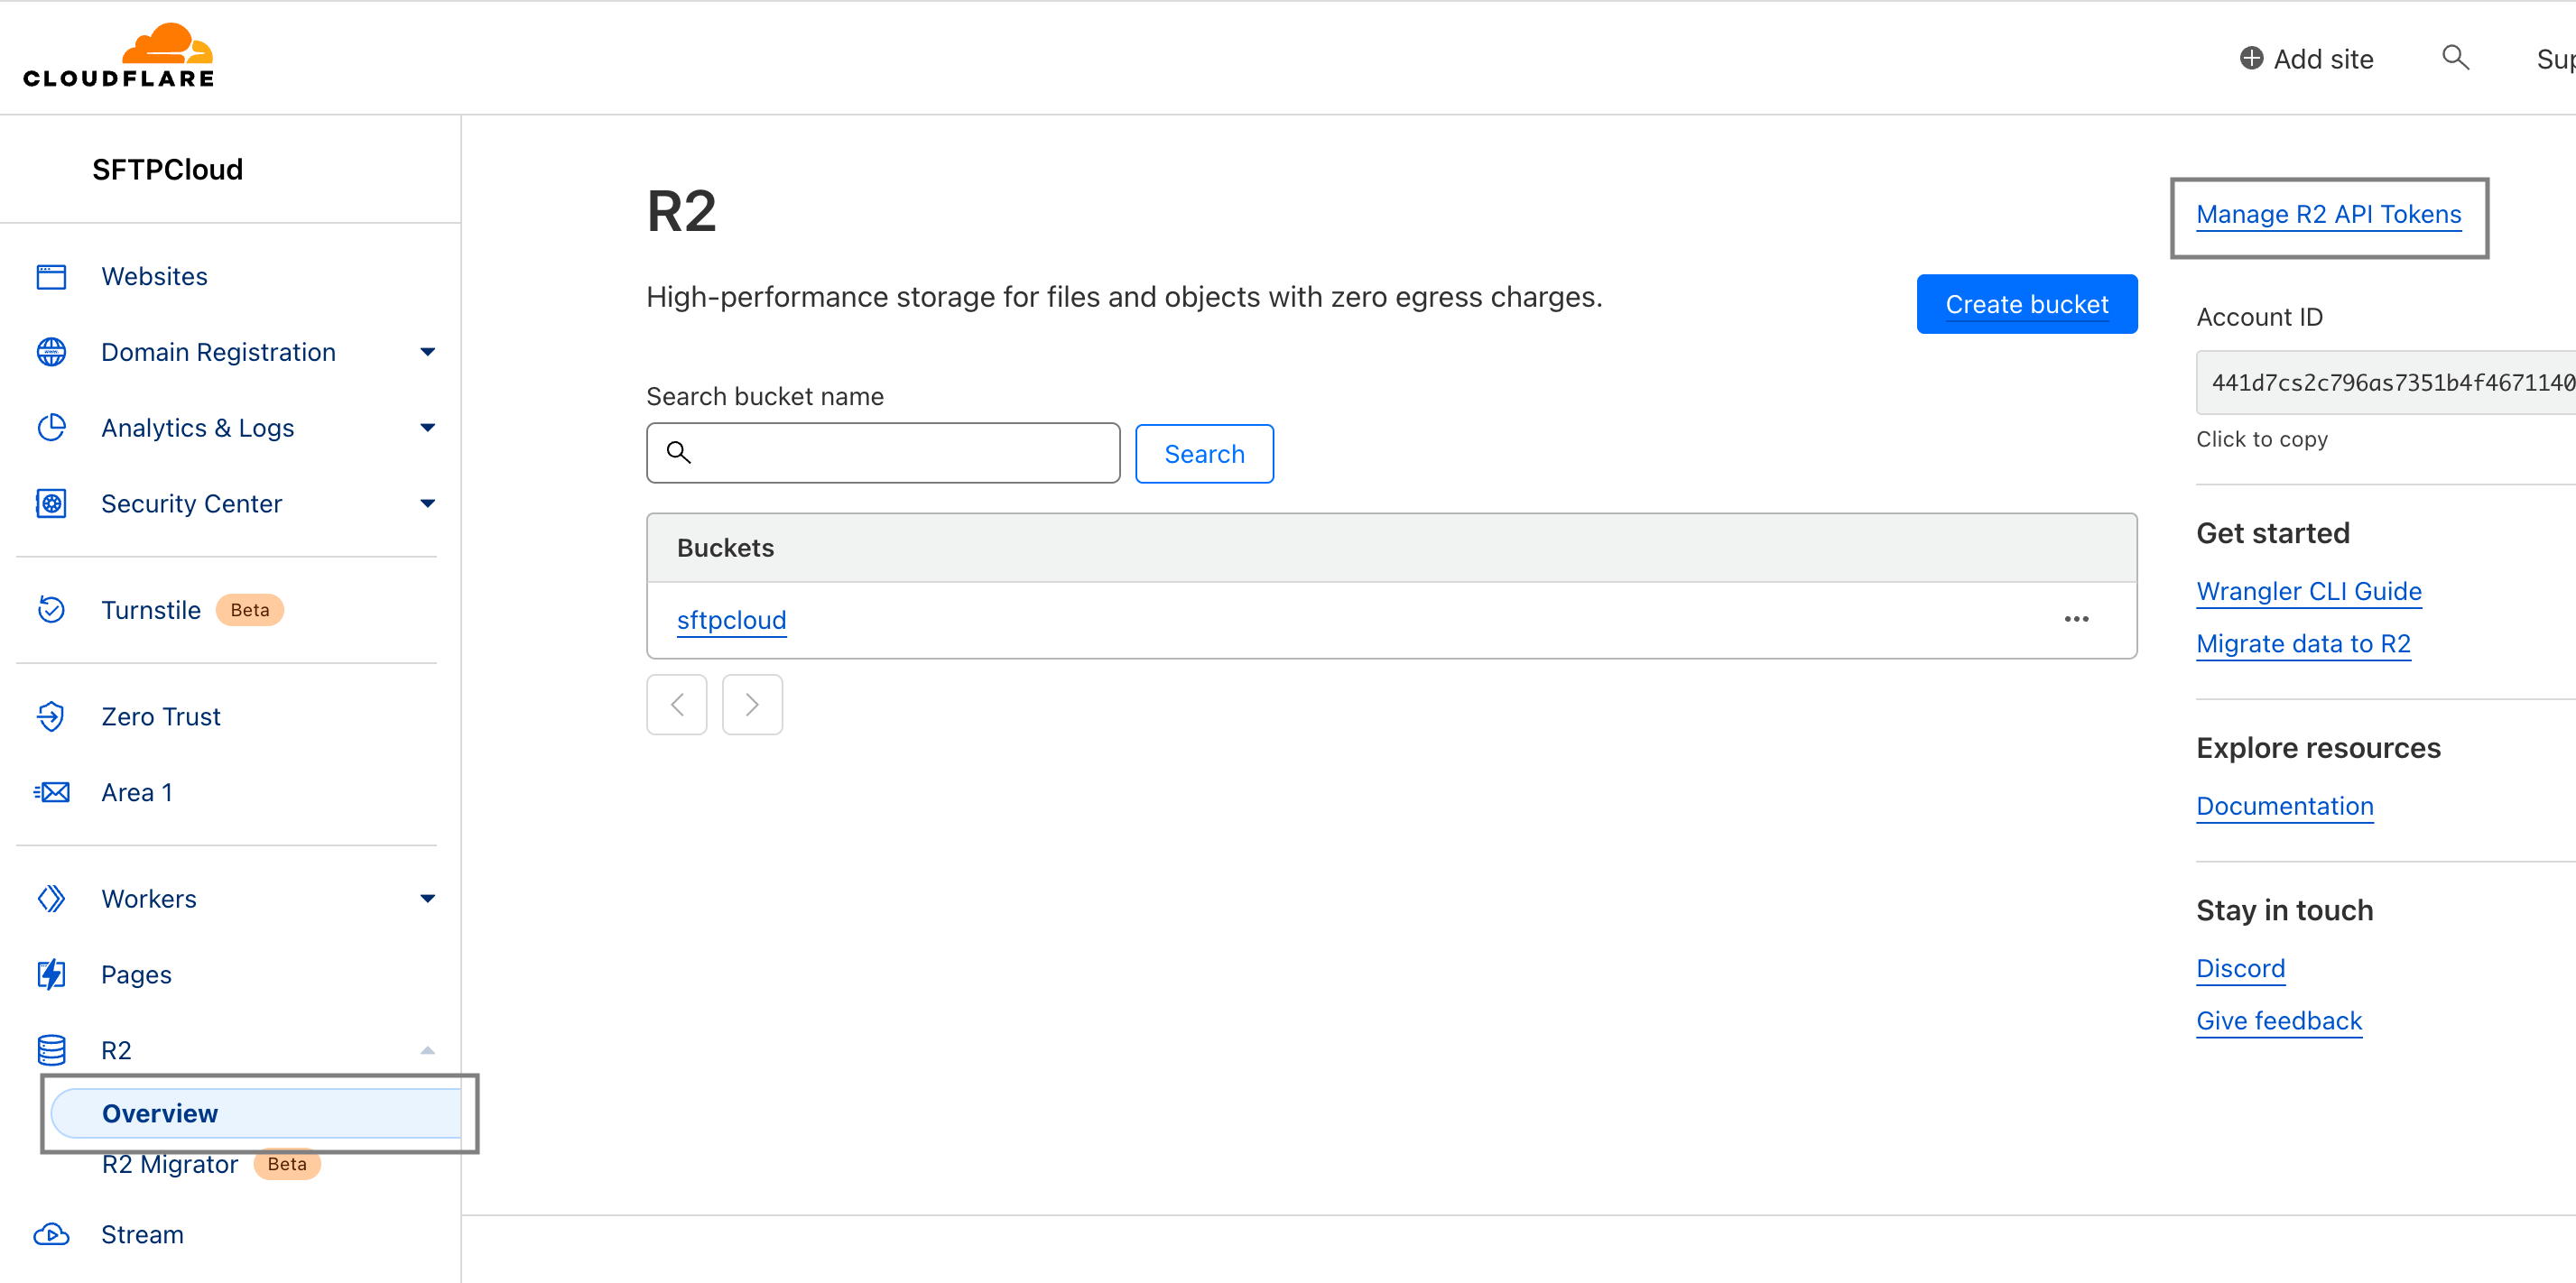 Now you have to give a name so you can easily recognize the new token in the future, grant
Edit access
, and select the
Forever
option as expiration. Now you can create the token by clicking the
Create API Token
button.
Now you have to give a name so you can easily recognize the new token in the future, grant
Edit access
, and select the
Forever
option as expiration. Now you can create the token by clicking the
Create API Token
button.
 Keep the page open because you will need the
Access Key ID
&
Secret Access Key
in the next step and Cloudflare will not display them again.
Keep the page open because you will need the
Access Key ID
&
Secret Access Key
in the next step and Cloudflare will not display them again.
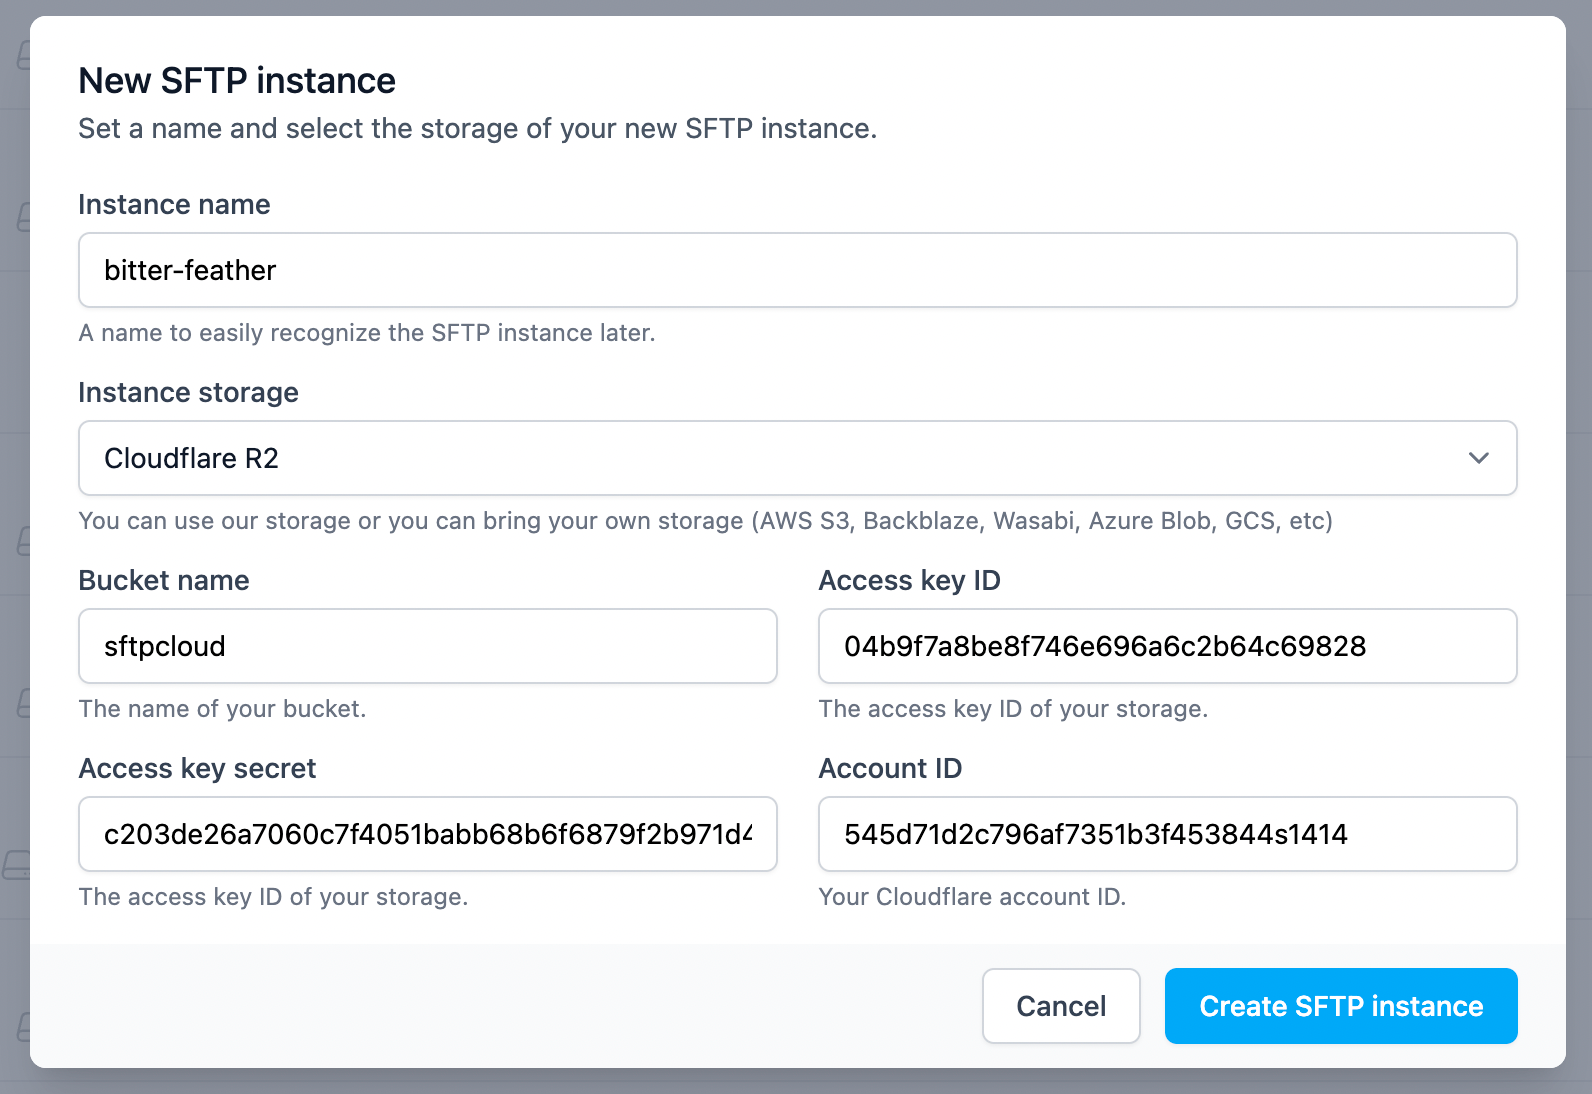
3. Create an SFTP instance using the new storage
Follow the steps from here in order to create a new instance and select Cloudflare R2 as the storage type. When Cloudflare R2 is selected, more inputs will appear. Fill in the inputs with the credentials created in the previous steps. You also need your Cloudflare account ID which can be found on the Cloudflare R2 main page.