Open menu
Learn
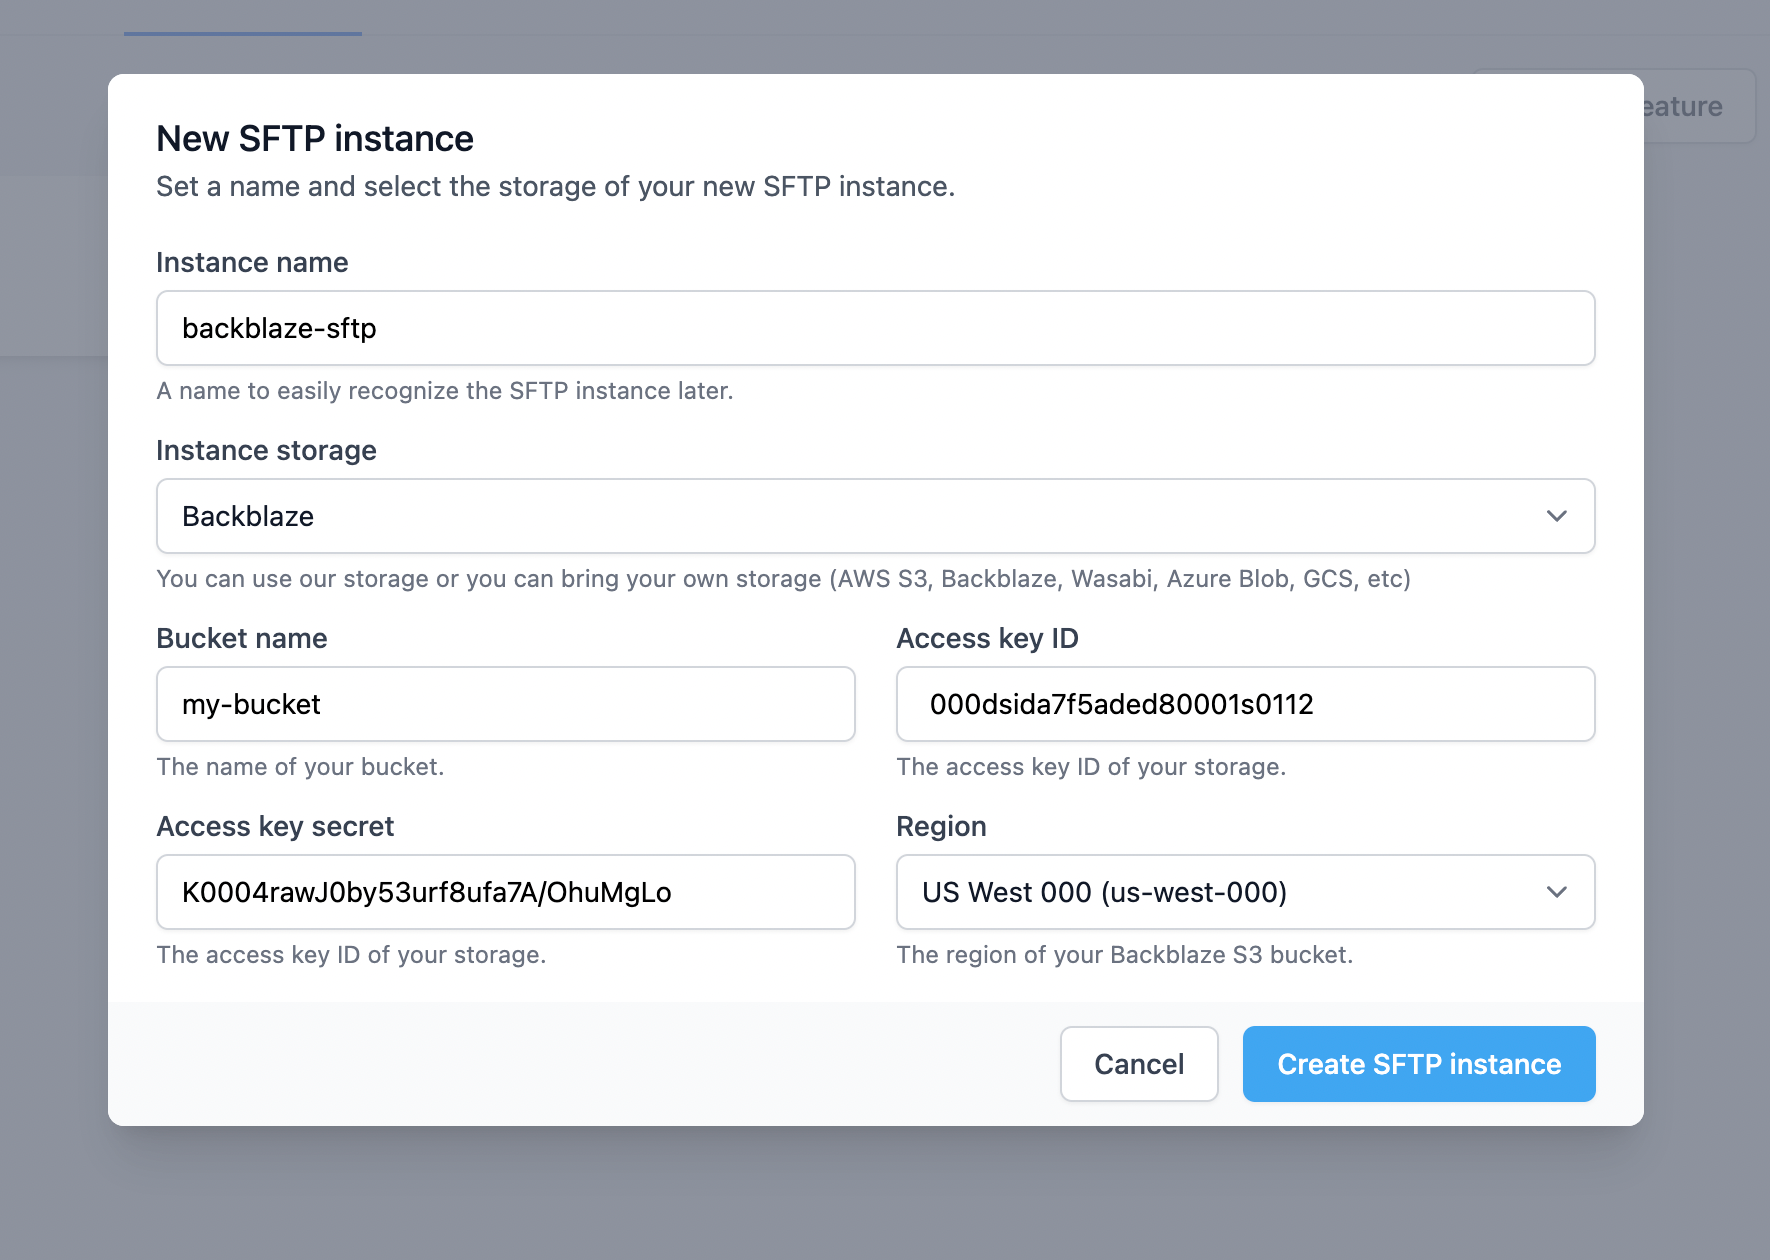
 Now it's time to name the new server and provide the storage credentials needed to establish the connection with Backblaze B2. In this example,
backblaze-sftp
was used as the name of the instance. Select
Backblaze
as instance storage.
Type the name of your bucket into the
Bucket name
field. In case you don't already have a bucket, create one (if you need help creating the bucket, follow the
Backblaze docs
).
Into the
Access key ID
and
Access key secret
fields paste the
keyID
and
applicationKey
you generated at step 1. You also have to select the region where your Backblaze bucket is located and then click the
Create SFTP instance
button.
Now it's time to name the new server and provide the storage credentials needed to establish the connection with Backblaze B2. In this example,
backblaze-sftp
was used as the name of the instance. Select
Backblaze
as instance storage.
Type the name of your bucket into the
Bucket name
field. In case you don't already have a bucket, create one (if you need help creating the bucket, follow the
Backblaze docs
).
Into the
Access key ID
and
Access key secret
fields paste the
keyID
and
applicationKey
you generated at step 1. You also have to select the region where your Backblaze bucket is located and then click the
Create SFTP instance
button.
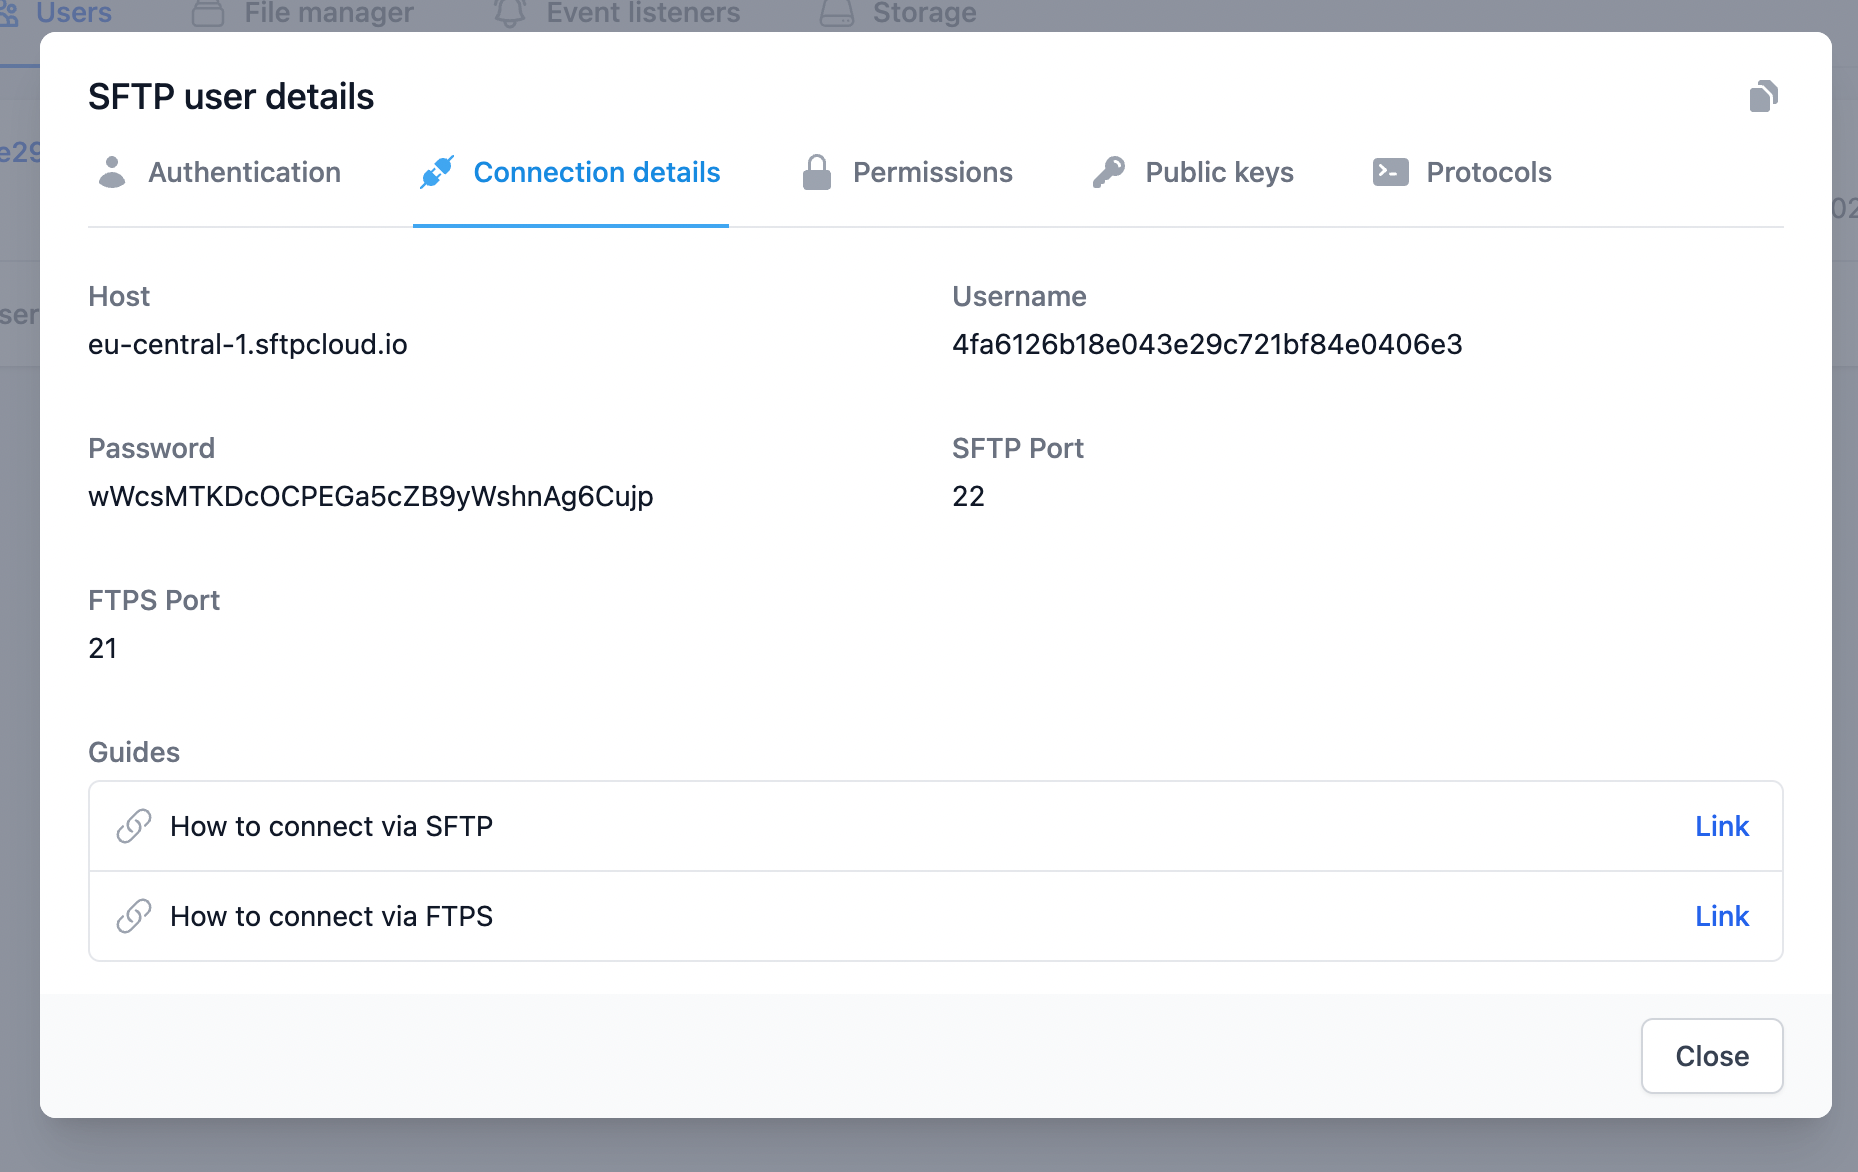
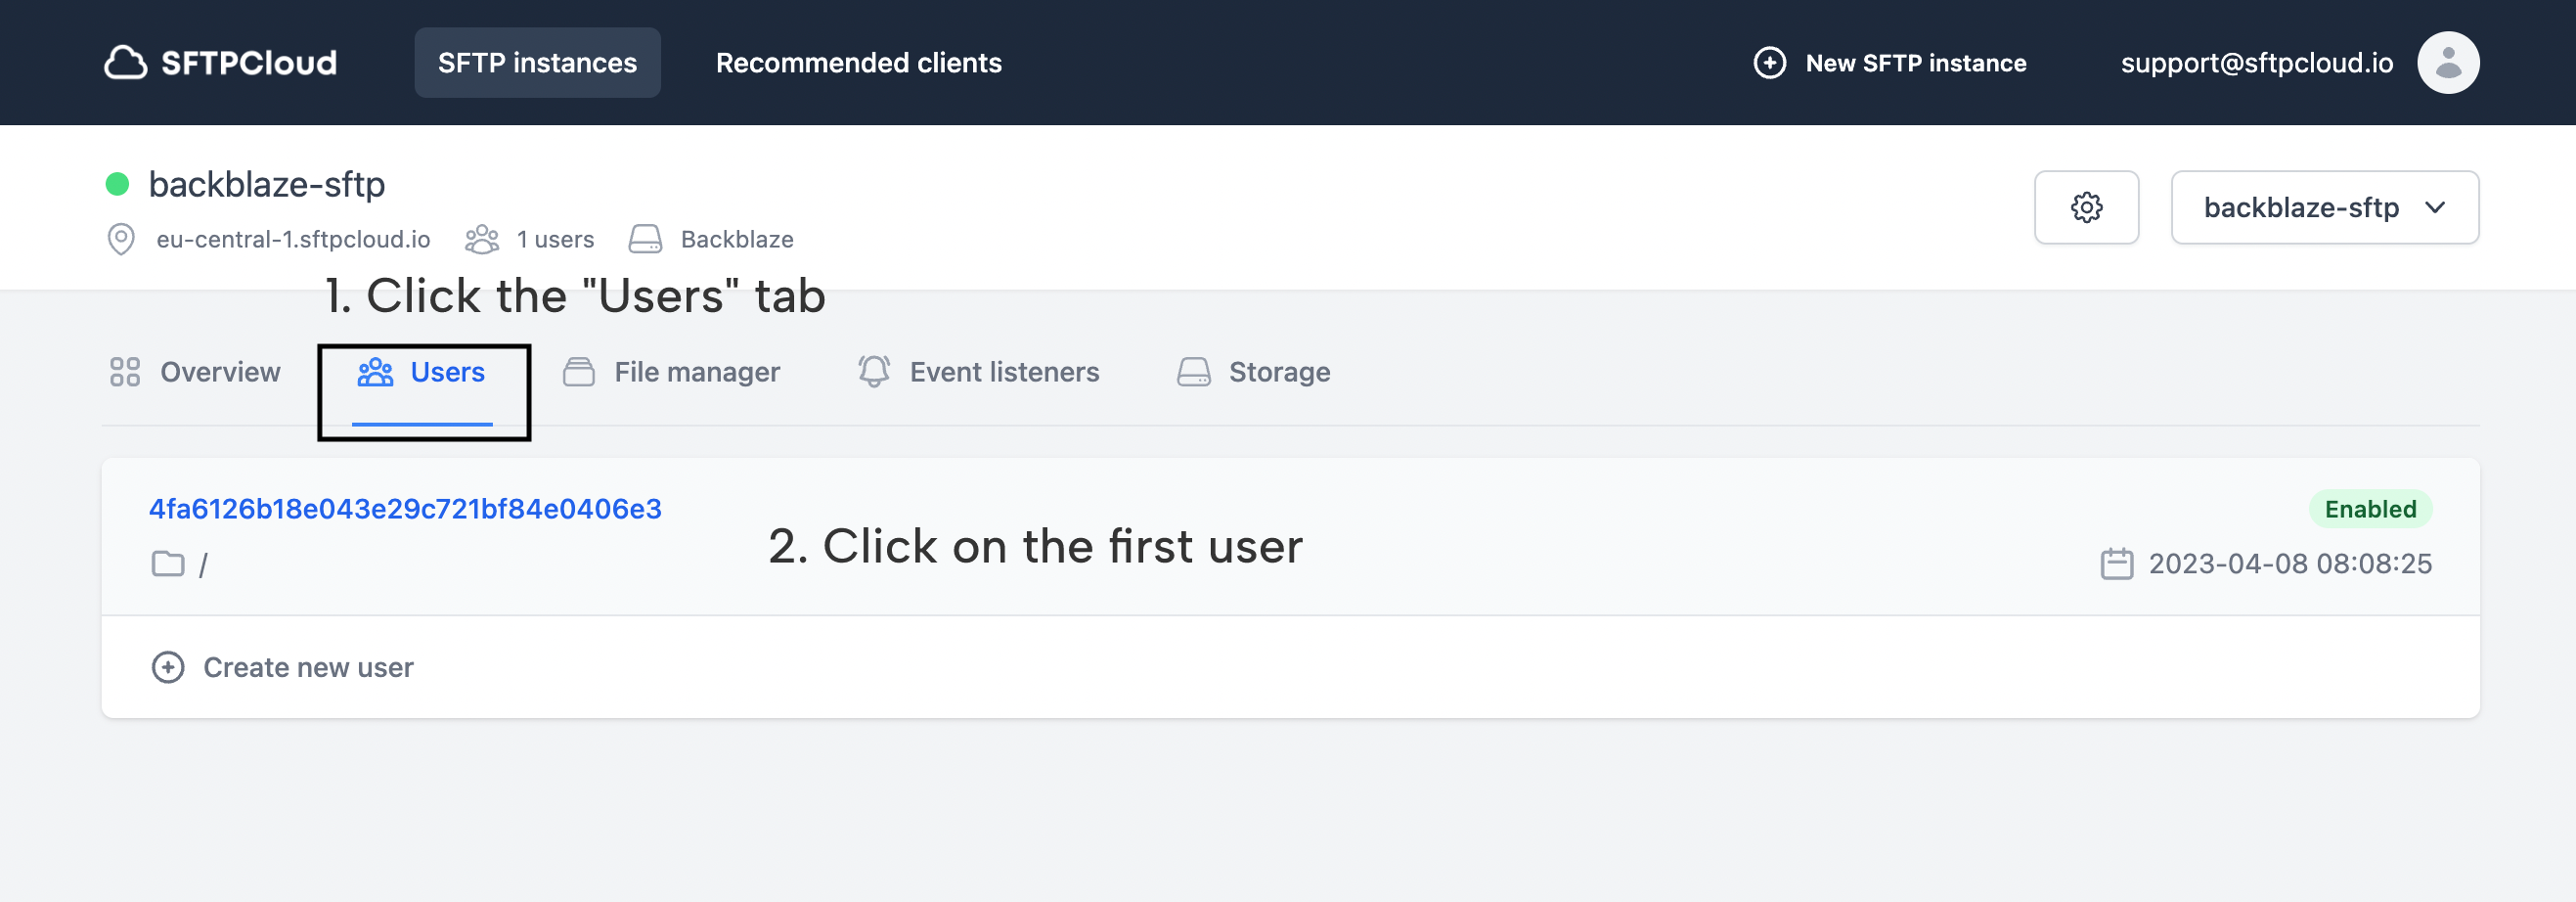 A modal with the user details will appear. Click the
Connection details
tab and there you have all the required details in order to connect to the FTPS/SFTP server powered by your Backblaze B2 cloud storage.
A modal with the user details will appear. Click the
Connection details
tab and there you have all the required details in order to connect to the FTPS/SFTP server powered by your Backblaze B2 cloud storage.